Giant French Macaron Cake


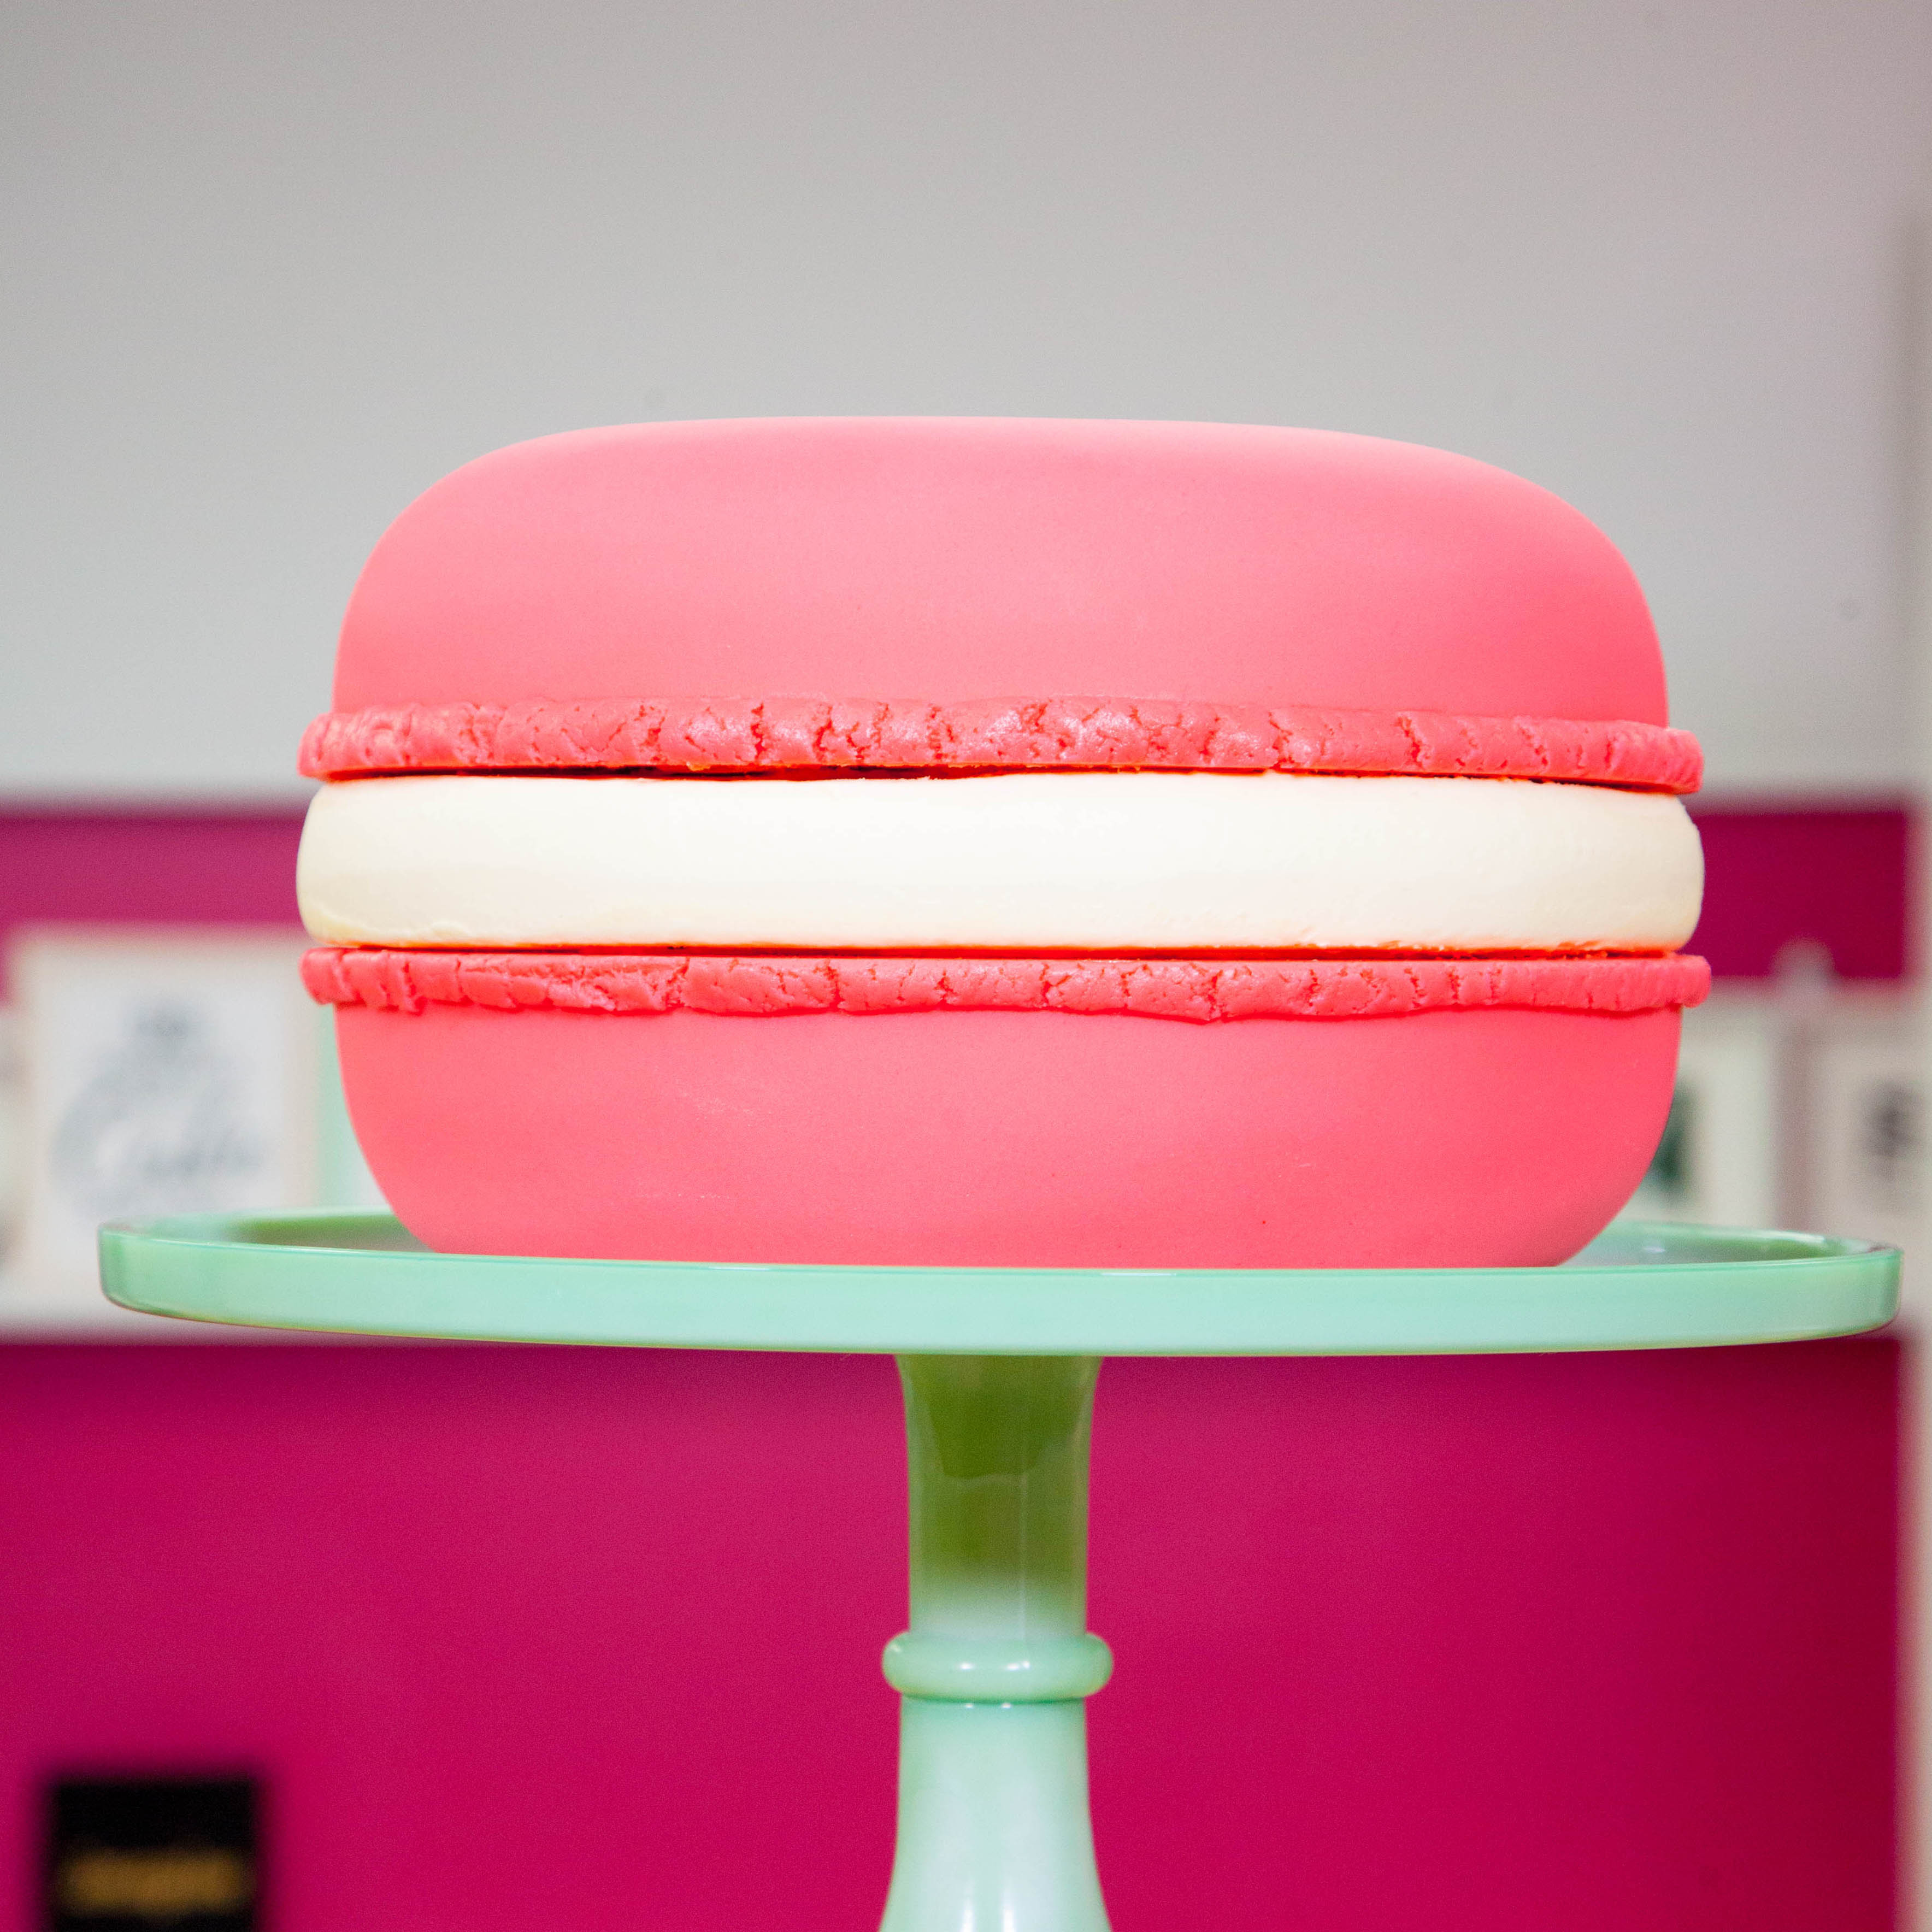
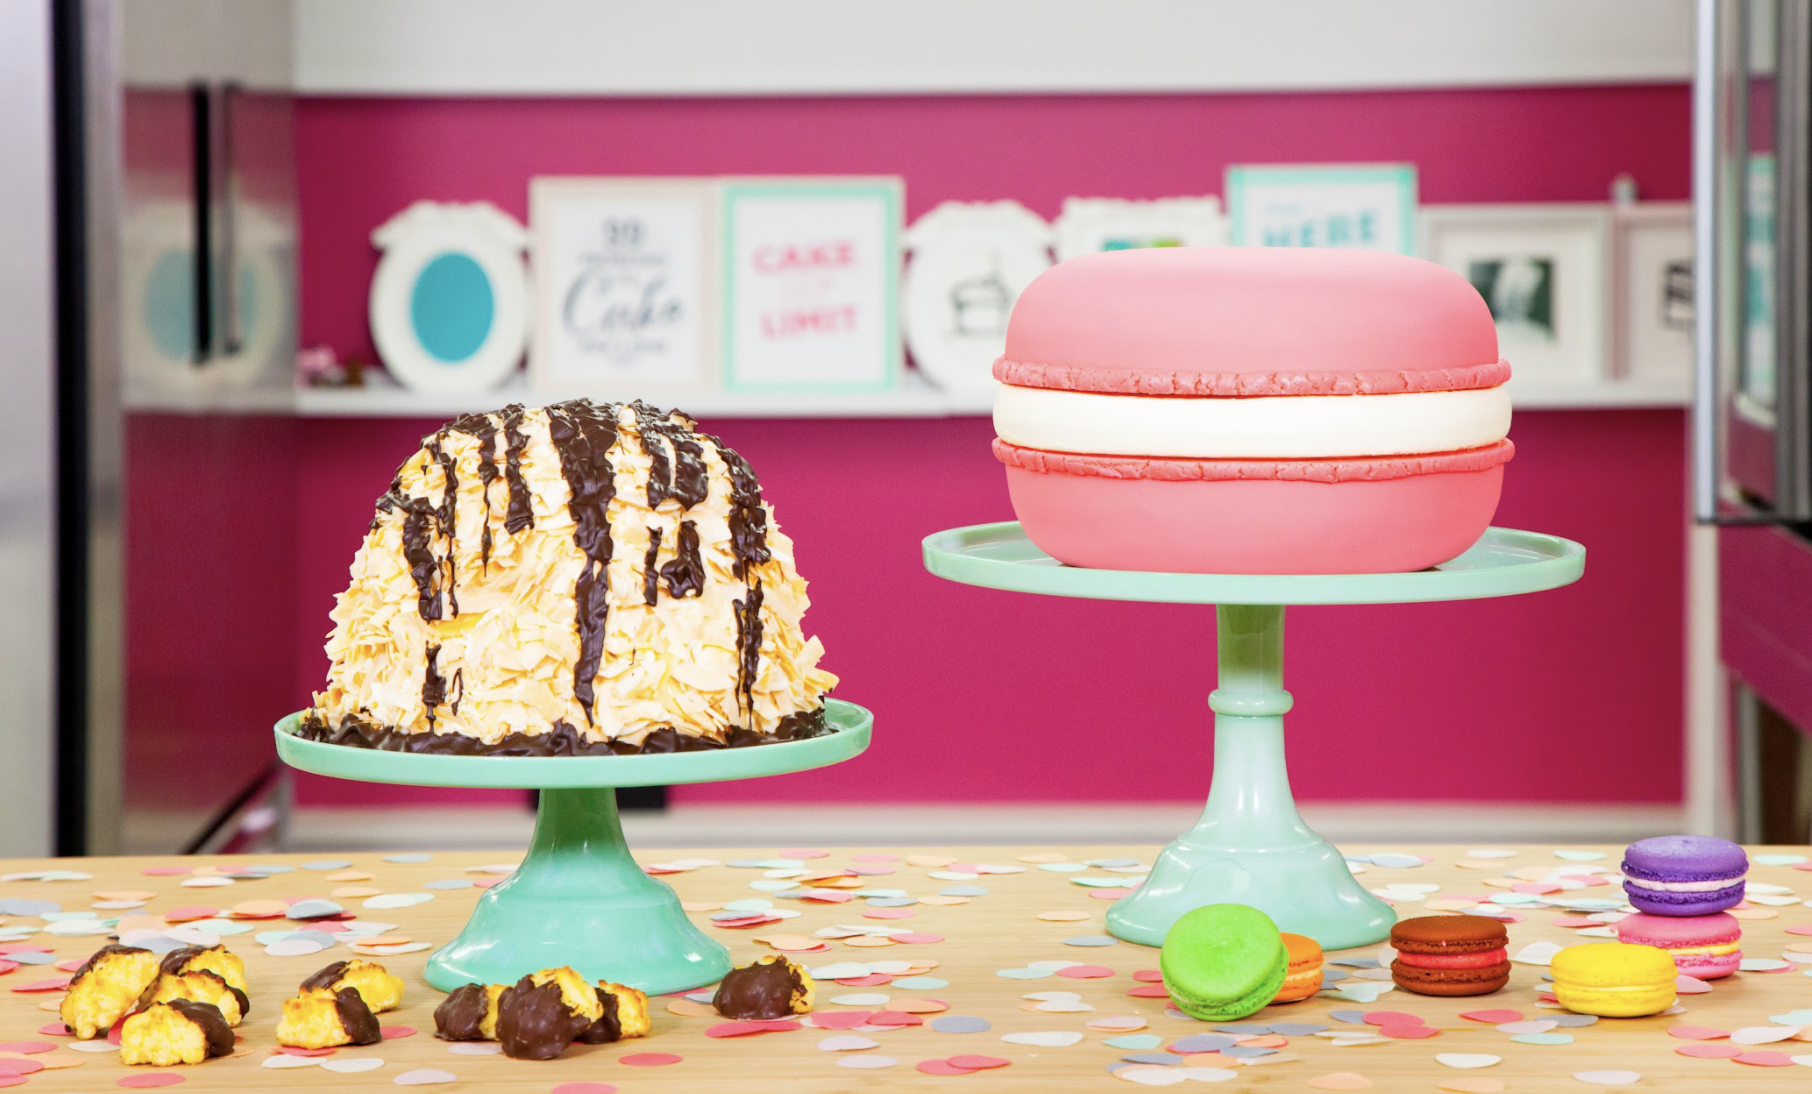
A GIANT Version Of Your FAVE Delicate French Cookie - in CAKE! Is it just me, or can you not go to a bakery, cafe or patisserie anymore without finding a sweet display of French macarons in every colour or flavour you can imagine!? But while these airy buttercream-filled almond cookies are on the rise in popularity, the humble coconut macaroon is losing its street cred!
So, to settle the debate once and for all, I’m caking the GIANT version of BOTH sweet treats! To make this Giant French Macaron cake, I whipped up some pink Vanilla cake, iced it all in pink Italian Meringue buttercream and covered them in pink fondant with a crinkly footing. I even sandwiched both layers between a SWEET chocolate cake “buttercream” layer so that the finished result really looked like a perfectly-crafted delicate macaron.
Which one do YOU prefer?


Ingredients
Cake
- 6 lbs of Yo’s Ultimate Vanilla Cake
- Wilton Color Right Pink
- 2 lbs Yo’s Ultimate Chocolate Cake
Icing
- Simple Syrup
- Italian Meringue Buttercream
- Wilton Color Right Yellow
Decorations
- 2 lbs of Pink Fondant
- Vegetable Shortening
- Piping Gel
- Icing Sugar

Tools
- 2 x 9” Round Cake Pans, lined with parchment paper
- 1 x 8” Round Cake Pan, lined with parchment paper
- Sir Squeeze A Lot
- Small Straight & Offset Spatula
- Rolling Pin
- Fondant smoother
- Paint brushes
- Piece of Acetate
- Ruler
- Spatula
 Gourmet Cake Slices with Yolanda Gampp
$29.99
Gourmet Cake Slices with Yolanda Gampp
$29.99


Read It!
-
Prepare 6 lbs of Yo’s Ultimate Vanilla Cake and gently fold in about ¼ tsp of Wilton Color Right Pink food dye until your batter reaches a soft pink colour. Divide your batter evenly between two 9” round cake pans and bake at 350 degrees for 1 hour and 20 mins, or until a toothpick comes out clean. Cool cakes completely in their pans sitting on a wire rack.
-
Prepare 2 lbs of Yo’s Ultimate Chocolate Cake and pour into one 8” round cake pan. Bake at 350 degrees for 55 mins, or until a toothpick comes out clean. Cool cake completely in its pan sitting on a wire rack.
-
Prepare your Italian Meringue Buttercream. Set aside. Dye 2 cups of buttercream a similar shade of pink as your cake by folding in a touch of the same Wilton Color Right Pink you used to dye your batter, but softened with a bit of Wilton Color Right Yellow.
NOTE: Because vanilla cake starts out with a yellow tint, adding a touch of yellow dye to your pink buttercream is actually the best way to achieve a colour that is similar to your cakes.
-
Prepare your simple syrup and set aside at room temperature.
-
Once your cakes are completely cool, gently remove them from their pans. Take your two pink vanilla cakes and level them as high as possible with a serrated knife, making sure not to remove those cake humps. (We’ll be using them to our advantage in the next step!) Flip your cakes over and cut off all the caramelization from the bottoms, as well. Next, level your chocolate cake with a ruler and serrated knife as you would normally do, removing those humps and making sure it is completely flat. Set aside.
-
Starting with your chocolate cake layer, slightly round out the top and bottom edges of your cake with a serrated knife so that it looks like one big ‘patty’ or disc. Set aside. Next, take your first pink vanilla cake and round out the top and sides all around your cake only, so that it looks like a ‘dome’ or ‘donut’ shape. Make sure to remove all of the caramelization from the top and sides as you go, but keeping the bottom flat. Repeat with the second vanilla cake layer.
-
Shower all of your cake layers with a layer of simple syrup. Allow the simple syrup to soak in completely before moving on to the next step.
-
Crumb coat your chocolate cake with plain Italian Meringue buttercream using your small offset spatula. Next, crumb coat your two vanilla cakes with soft pink Italian Meringue buttercream using the same method. Chill all three cakes in the fridge for about 20 minutes.
-
Remove your pink vanilla cakes only from the fridge and ice again, making sure that the buttercream is completely smooth and even on all sides. Chill for another 20 minutes. Once the buttercream is chilled and firm, smooth out any ridges and set aside.
-
Remove your chocolate cake layer from the fridge and ice again, this time being very generous with your buttercream. Next, we’ll be using one of my FAVE inventions to help build up the buttercream on the sides - my handy sheet of acetate! (You can watch me use this in my Unicorn Cornucopia & Giant Cupcake videos.) Take your sheet of acetate and curve it all around your cake so that it helps to shape the buttercream into a rounded, even edge on all sides. Chill for another 20 minutes. Once the buttercream is chilled and firm, repeat the same process. Continue repeating this building and chilling process until the width of your chocolate cake reaches the same size as your pink vanilla cake layers.
NOTE: If you realize, when you’re about to assemble your chocolate cake layer, that you’ve built up your buttercream a bit too much, you can actually use the sheet of acetate in REVERSE to scrape away the buttercream from your chilled cake. This is a really helpful tip to note if you feel like the ‘macaron filling’ sticks out too much!
-
Roll out about half of your pink fondant so that it is ¼ of an inch thick and larger in diameter than the size of your first layer of pink vanilla cake. Gently drape the fondant over your cake using a French Rolling Pin to help pick the fondant up, and smooth it to the sides of your cake with a Fondant Smoother or your fingertips. Trim away any excess using a sharp paring knife. Repeat with your second pink vanilla cake.
-
Macarons tend to come come with some unique crinkly markings along the foot of each cookie. To recreate this look, take your remaining pink fondant and knead in enough vegetable shortening so that the fondant feels like it’s breaking down. You’ll know there’s enough shortening when the fondant begins to break and fray a little as you’re kneading. Next, measure the circumference of your pink cakes. Roll out your broken fondant into a long tube with your hands, then use a rolling pin get that tube to about ¼ of an inch thick and the length of the circumference of your cakes. Don’t be too worried if the fondant breaks and frays as you’re rolling! You can attach this part in pieces. Carefully cut off the frayed ends with a sharp paring knife, brush a bit of clear piping gel around the bottom of your pink cakes and attach to the bottom of each cake to mimic that airy edge of the macaron cookie. Let dry.
-
It’s time to assemble! Place your first pink cake upside down on a large cake board. Make sure to measure the diameter of your pink cake layer and ensure that your middle “buttercream” layer is about the same width, within a quarter of an inch. If it isn’t, go back to Step #10 and continue building up the sides until it’s around the same diameter, or scrape some of the buttercream away if it is too big. Next, gently lower your middle “buttercream” layer on top. Finally, place your last pink cake right on top.
Congratulations you did it!
