Tiffany & Co. Box


Chain , Collection--giant-cake-recipes , Collection--novelty-cake-recipes , Cotton candy , Gift , Gift box , Heart locket , Jewelery , Jewellery , Locket , Necklace , Present , Recipes-export , Romantic , Tiffany , Tiffany and co , Tiffanys , Valentine , Valentine's day , Valentines , Vday
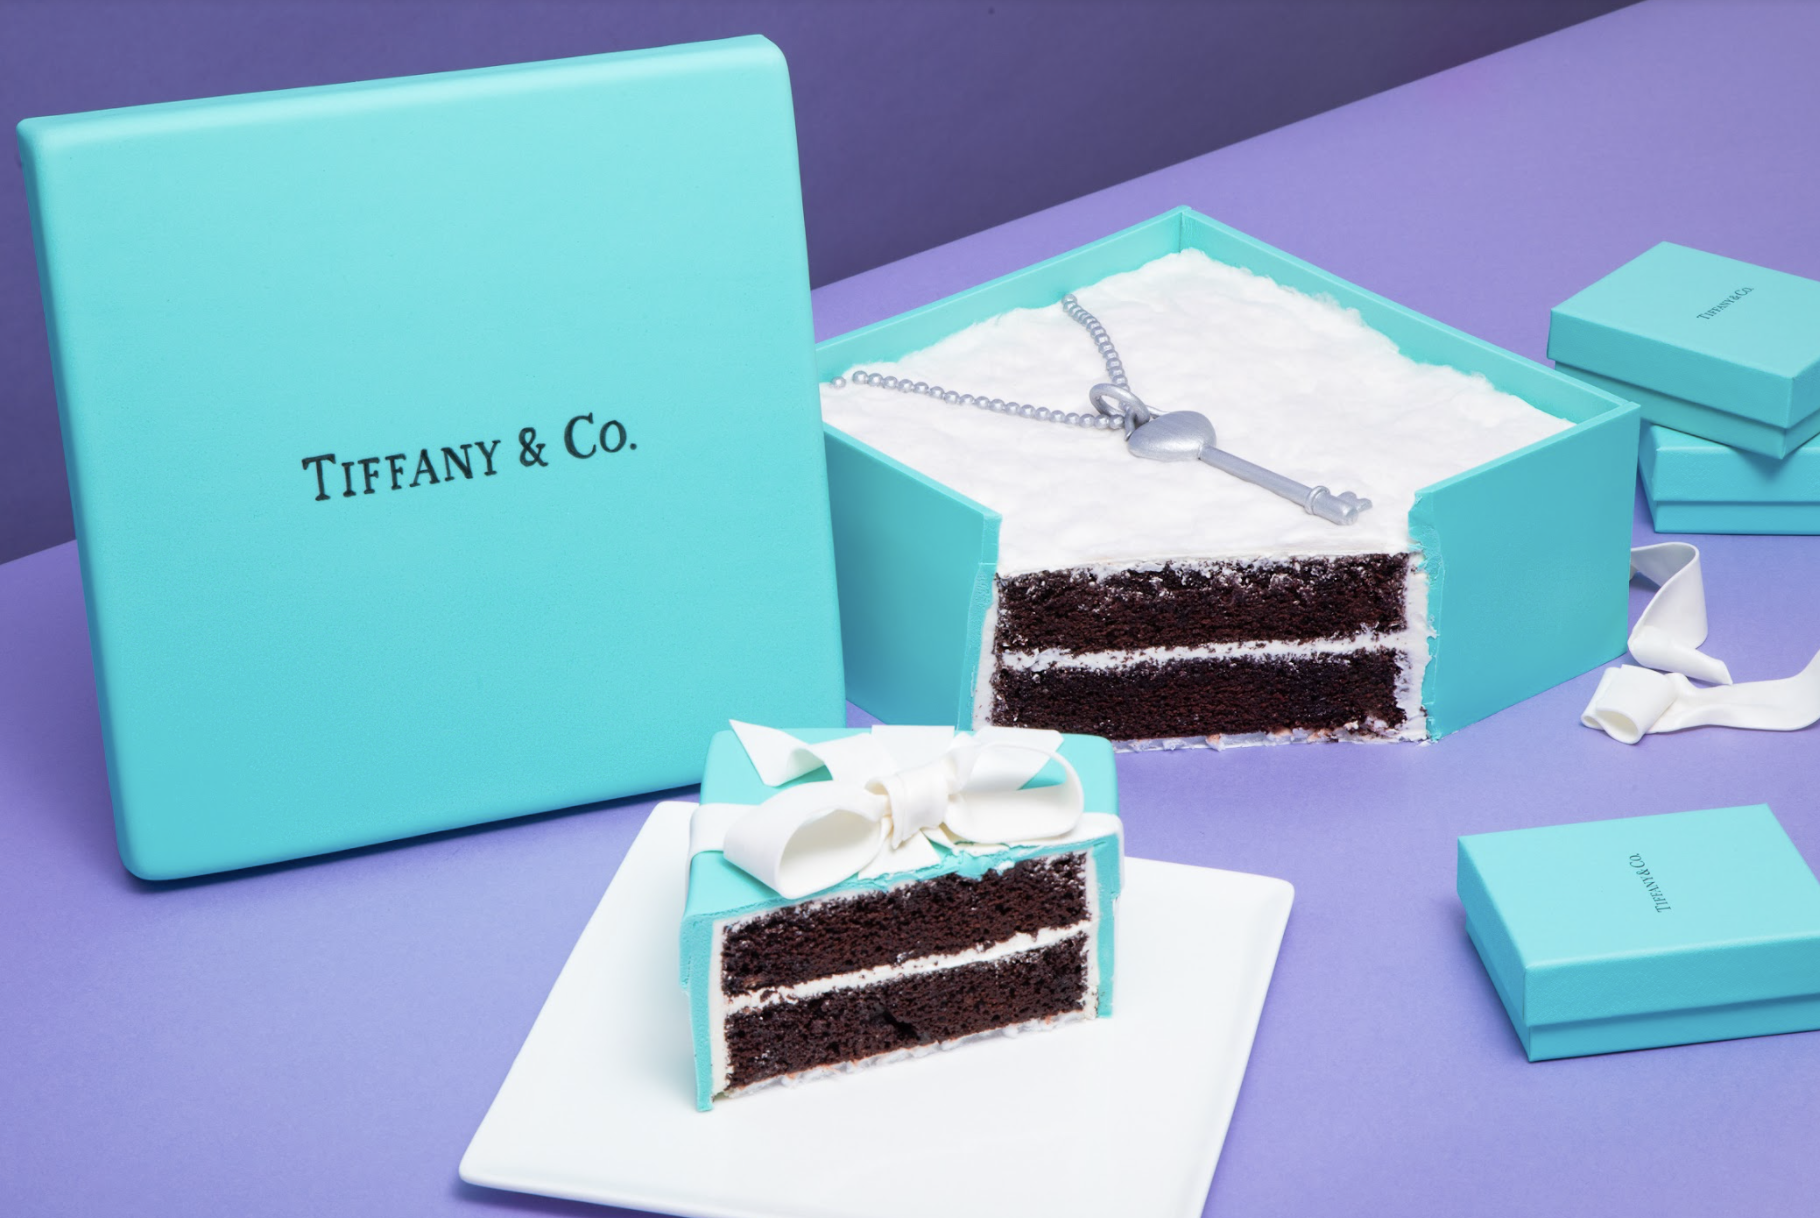
A Tiffany’s Box. Need I say more? The Tiffany’s Box has become a luxury in itself and is one of the most recognizable gifts ever! If you want to give someone a sweet Breakfast at Tiffany’s experience, follow this recipe to cake up the trademarked Tiffany Blue box!
To cake this iconic Tiffany’s Box, I began with 8lbs of my Ultimate Chocolate Cake and stacked it with a sweet Italian Meringue Buttercream - a classic cake for a classic gift! The cake is covered in a forget-me-not blue fondant and wrapped with a perfect satin white bow. Though the box is already as much as a gift as what’s inside, I made a classic silver chain necklace out of gumpaste which sits on a white cotton candy layer. Who said red was the color of love? ;)


Ingredients
Cake
- 8lbs of Yo’s Ultimate Chocolate Cake
Icing
- 1 batch of Simple Syrup
- 1 batch of Italian Meringue Buttercream
Decorations
- 4lbs of teal fondant
- 1oz grey gumpaste
- Silver lustre dust
- Pearl lustre dust (satin white)
- White cotton candy
- Wafer paper

Tools
- 2 x 10" square cake pan
- Simple Syrup Squeeze Bottle
- Parchment Paper
- 9" square styrofoam riser
- Heart key chocolate mold
- Chain chocolate mold
- Black food coloring marker
- Small offset spatula
 Gourmet Cake Slices with Yolanda Gampp
$29.99
Gourmet Cake Slices with Yolanda Gampp
$29.99


Read It!
-
Line your pans with parchment paper and preheat your oven to 350 degrees Fahrenheit. Prepare 8lbs of Ultimate Chocolate Cake then divide the batter evenly into your two pans. Bake both cakes for 1 hour and 5 minutes.
TIP: Let your cakes cool completely in the pans before removing.
-
Remove your cakes from their pans then level each of them making sure to save the humps. Cut your cake down to an 8” square. Level your humps then cut them into 4” squares.
-
Use Sir Squeeze A Lot to soak all of your layers with simple syrup them let them sit for a couple of minutes to absorb.
-
Fill your layers with Italian Meringue Buttercream and stack them in two cakes according to sizes - 4” cake and 8” cake.
-
Crumb coat your entire cake with Italian Meringue Buttercream then place it in the fridge to chill. Remove your cake from the fridge then ice once again. Use a bench scraper to smooth out the edges and ice again to perfect if necessary.
-
Measure the height of your cakes then roll out teal fondant into 4 large slabs large enough to cover each side. Chill the fondant sheets.
-
Cover the 9” square styrofoam riser with clear piping gel. Roll out teal fondant and drape it over the riser. Smooth down the sides with a fondant smoother then carefully flip it upside down and smooth it out. Trim the excess.
-
Cut the fondant slabs to the appropriate height then smooth them to the sides of the cake - do 2 opposite sides at a time. Trim the excess flush to the edges then repeat with the two remaining sides.
-
The 8” cake will have a lip so cut slabs of fondant taller than the cake. For the 4” cake (which will be closed), cut the slabs to the exact height of the cake.
-
Fill in the top of the 4” cake with IMBC to even it out.
-
Roll out fondant larger than the top of the 4” cake then drape the sheet over and smooth the top out. Chill your cake until the fondant is firm then cut the excess at the corners straight - like a lid. (Use photo as reference)
-
Use your grey gumpaste and a mold to form a heart (the locket). Roll your gumpaste thin then cover a lollipop stick and attach it to the heart. Make the key and loops out of more gumpaste. Then lastly, make a chain using a mold and set all your pieces aside to dry. Once they are dry, paint them with a mix of silver lustre dust and clear food grade alcohol.
-
Roll out thin white gumpaste then cut it into bands. Use clear piping gel to stick a band down the centre of each side of the 4” cake. Make a bow out of more white gumpaste bands then let it dry. Once it’s dry, paint it with a mix of satin white lustre dust and clear food grade alcohol. For the 8” cake, create an unravelled bow out of more bands and let it dry. Paint it in the same satin white mix.
-
Use a black food coloring marker to write “Tiffany & Co.” on the top of the box. Use a photo as reference.
-
Cut out some wafer paper to fit inside the open box cake then lay it inside. Press and flatten white cotton candy into the bottom of the 8” cake pan to form to the shape then lay it on top of the wafer paper. Lastly, carefully lay the necklace into the box and position it until you are satisfied.
Congratulations you did it!
