Graduation Cap


2020 , Cap , Class of 2020 , Collection--giant-cake-recipes , Collection--novelty-cake-recipes , Collection--novelty-recipes , Congrats , Congratulations , Cream cheese frosting , Grad , Grad cap , Grad day , Grad hat , Graduation , Graduation cap , Graduation hat , Hat , Lemon simple syrup , Recipes-export , School , University
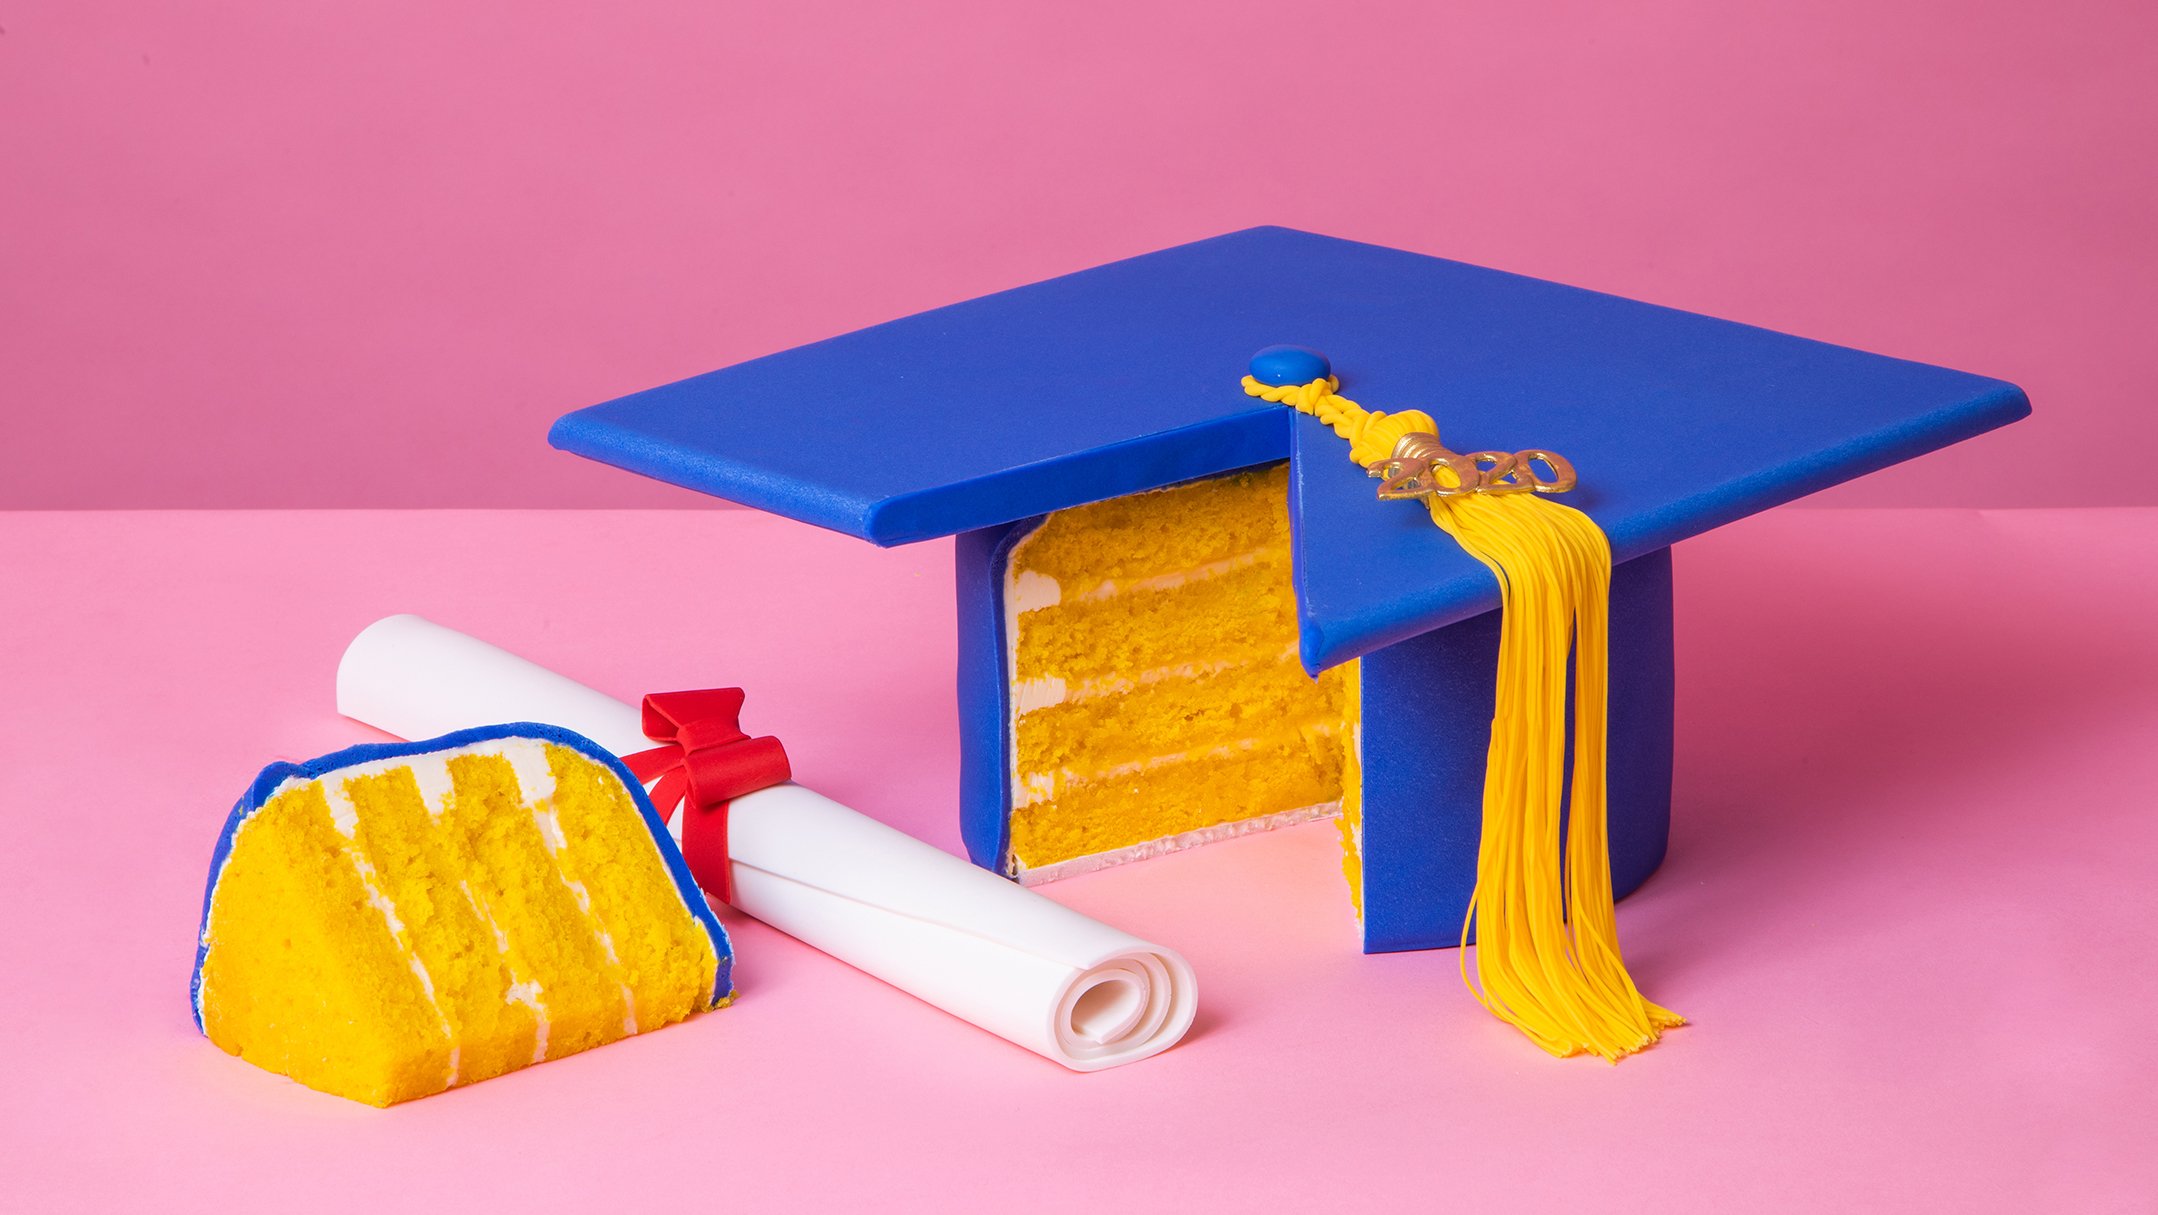
Graduates, this one’s for you! I know graduation isn’t the same this year but that doesn’t mean it can’t be sweet. This cake is great for beginners and the perfect cake to celebrate anyone missing out on their graduation ceremony this year!
This graduation cap is definitely worth celebrating because of all the delicious flavors! I started with 4lbs of my Ultimate Vanilla Cake dyed a bright yellow and soaked the layers in lemon simple syrup then stacked them up with my classic Italian meringue buttercream, rich cream cheese frosting, and lemon curd. I draped the entire cake with a dusty blue fondant and topped it off with a cake board covered in the same blue. The tassel is definitely worth the hassle so I used a clay extruder to create thin yellow fondant cords and completed them with a gold 2020 detail!


Ingredients
Cake
- 4lbs Yo’s Ultimate Vanilla Cake
Icing
- 1 batch of lemon simple syrup
- 1 batch of cream cheese frosting
- 1 batch of Italian meringue buttercream
Decorations
- Yellow gel food coloring
- 1lb 50/50 (½ fondant, ½ gumpaste)
- 4lbs blue fondant
- ½oz yellow gumpaste
- 4oz yellow fondant
 Gourmet Cake Slices with Yolanda Gampp
$29.99
Gourmet Cake Slices with Yolanda Gampp
$29.99


Read It!
-
Line your pans with parchment paper and preheat your oven to 350 degrees Fahrenheit. Prepare 4lbs of Yo’s Ultimate Vanilla Cake batter and dye it a bright yellow then divide it evenly into your two pans. Bake each for 1 hour. Let your cakes cool in their pans before removing.
-
Remove your cakes from their pans then level each one and remove the caramelization from the bottoms. Cut each cake into 2 layers.
-
Stack your layers and carve them into the shape of the cap base. Make sure you round the top edges off and remove the caramelization completely from the sides as you carve.
-
Once you are happy with the shape of your cake, unstack the layers then use Sir Squeeze A Lot to soak each cake layer with lemon simple syrup.
-
To fill and stack your cake, begin by piping an IMBC fence onto your first layer then spread cream cheese frosting into the centre and spread lemon curd on top. Repeat for each layer.
NOTE: The fence of IMBC will help keep the softer fillings (cream cheese frosting and lemon curd) in.
-
Crumb coat your cake with IMBC then let it chill in the fridge until firm. Ice once again with more IMBC using a bench scraper and a square piece of acetate to smooth out the edges.
-
Roll out your blue fondant then cover your cake with it and trim away all excess at the base. Roll out some more fondant and cover your square board with it - make sure to cover the bottom then glue on the fondant with piping gel and use a fondant smoother to smooth it out. Create an “X” shaped indent from corner to corner (almost like an envelope) then flip the board over onto parchment paper. Lay another sheet of fondant on and cover the sides.
-
Roll a bit of blue fondant into a ball then flatten it to create the button.
-
Use a little bit of royal icing to glue your fondant covered board to the top of the cake and add on the button. Let your cake set.
-
Roll out 1lb of 50/50 and cut it into a 11x14” sheet. Roll the sheet up around a thick wooden dowel like a diploma. Roll out some red fondant then use a bow cutter and a strip cutter to create a bow and a ribbon then wrap the strip around the diploma and glue the bow on top with clear piping gel.
-
Roll out some thin yellow gumpaste then use number cutters to cut out 2020. Glue the numbers together - slightly overlapping each, with clear piping gel then let it dry. Mix together some gold lustre dust with clear food grade alcohol and paint your numbers then allow to dry once again. Use a small strip cutter to create a small band of yellow gumpaste (which will act as the tassel clasp) then paint it gold as well and set aside.
TIP: Make more than you need just in case.
-
Clay extrude a bit of yellow fondant with the grass faceplate (one with many holes). Create numerous strands then lay them together and cut the ends even at bottom about 8” long. Clay extrude a couple thicker strands and twist them together to create a rope then lay some thinner strands on top and fold them over. Clay extrude some more larger cords then twist them together to create another rope then wrap it around the button. Carefully lay the tassel onto the cake letting it dangle over the side - gluing it in place with clear piping gel then line up and assemble the other parts of the tassel with it then place the button on top as if the rope is wrapped around it. Add the gold 2020 to the tassel.
Congratulations you did it!
