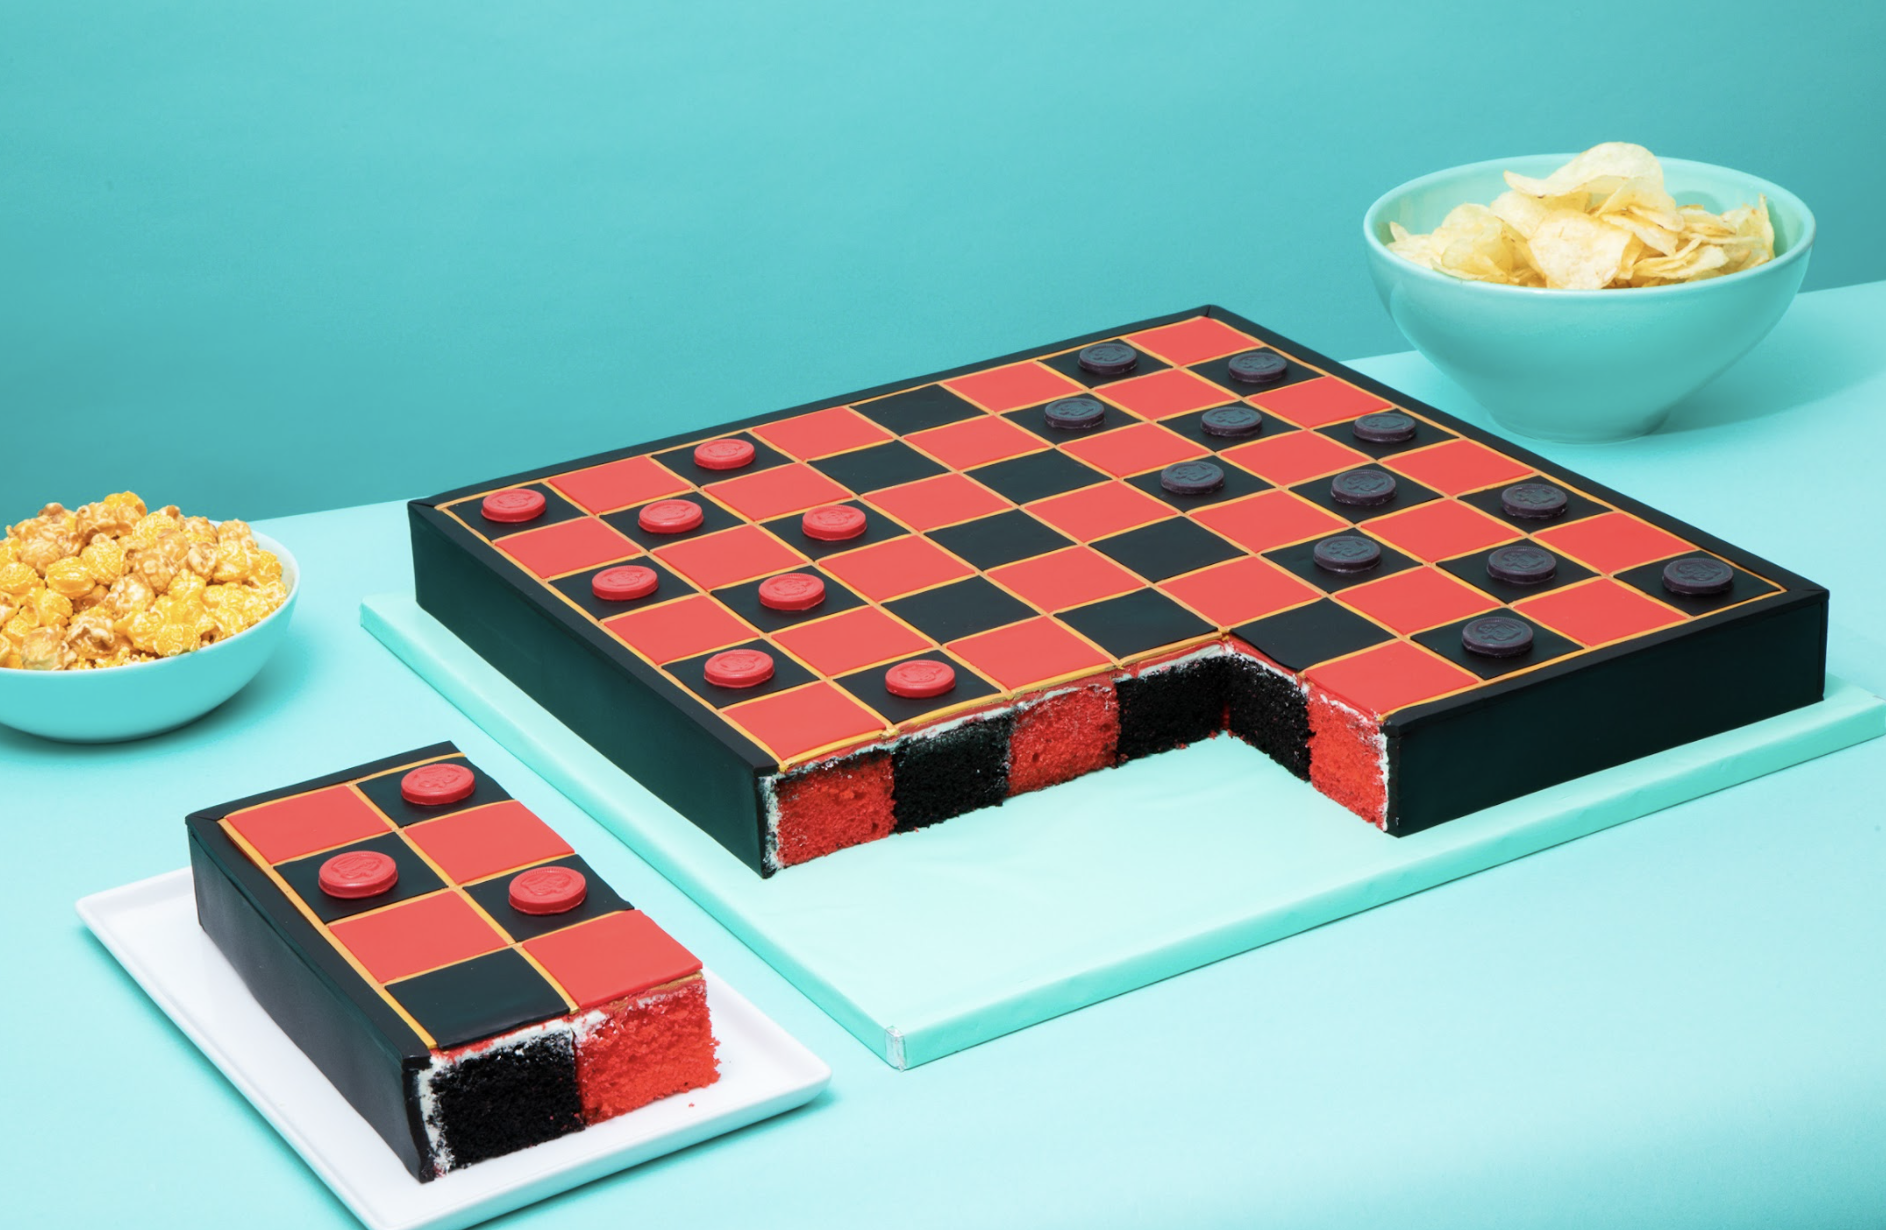
Checkerboard Cake


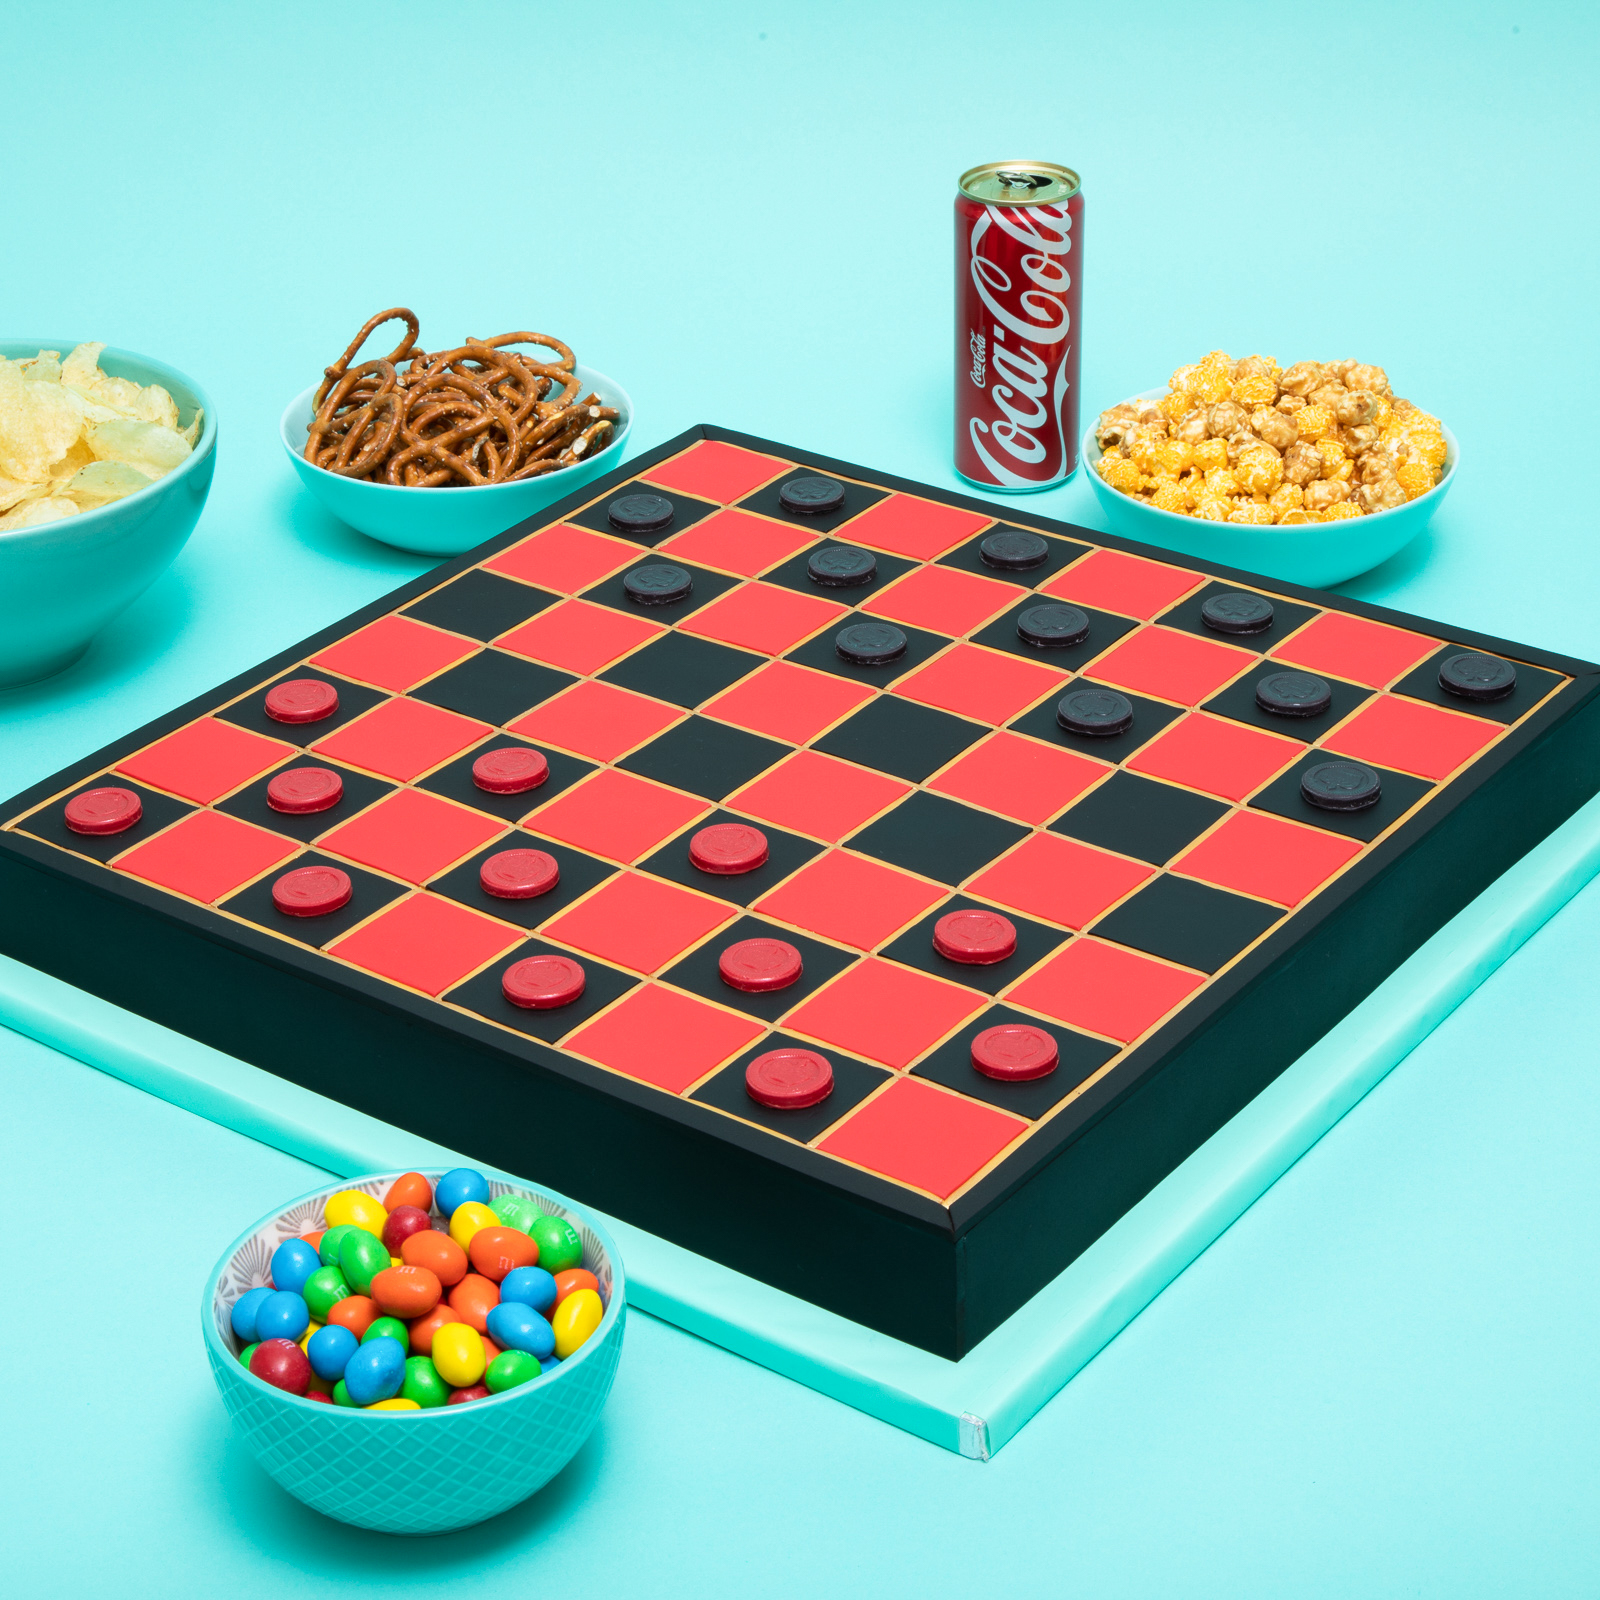
King Me! This checkerboard cake will be the sweetest addition to your game collection! Invite your friends over for a game night then end the night off with a delicious treat… It’s the perfect mess free game night because rather than putting the game away - you can just eat it!
This cake begins with 10lbs of my ultimate vanilla cake dyed a bright red and 10 lbs of black chocolate cake assembled in a grid for the coolest checkerboard cake slice ever! The cake is then topped off with fondant squares to match the colorful grid on the inside and giving the top a flat surface in case you want to play a couple rounds before eating it!


Ingredients
Cake
- 10lbs Yo’s Ultimate Vanilla Cake dyed red
- 10lbs Black Chocolate Cake
Icing
- 1 batch of Simple Syrup
- 1 batch of Italian Meringue Buttercream
Decorations
- 3lbs red fondant
- 4lbs black fondant
- 1lb dull yellow fondant
- Gold lustre dust
- Food grade alcohol
- ½ bag (6oz) red candy melts
- ½ bag (6oz) black candy melts

Tools
- 2 x 12x18" Rectangular Cake Pan
- Simple Syrup Squeeze Bottle
- Parchment Paper
- Xacto Knife
- Checker Piece Chocolate Mold
- Piping Bag
 Gourmet Cake Slices with Yolanda Gampp
$29.99
Gourmet Cake Slices with Yolanda Gampp
$29.99


Read It!
-
Melt your red candy melts then add it to a piping bag. Pipe it into cavities of your check piece chocolate mold. Allow them to set then repeat the same steps with black candy melts.
-
Line your pans with parchment paper then preheat your oven to 350 degrees Fahrenheit. Bake your cakes as follows:
12x18” rectangular cake pan → 10lbs red vanilla cake → 1 hour and 30 minutes
12x18” rectangular cake pan → 10lbs black chocolate cake → 1 hour and 20 minutes
TIP: Let your cakes cool completely in their pans and chill them.
-
Remove your cakes from their pans then level each of them. Remove the caramelization from the red cake.
-
Use a large serrated knife to carefully cut each cake into 32 cubes (2x2”). Try to make each one as even as possible.
-
Use Sir Squeeze A Lot to soak each of your cubes with simple syrup.
-
Assemble your cubes on a cake board like a checkerboard (alternating the cake colors). Use a bit of IMBC to glue each cube down.
TIP: I used masking tape as a border guide.
-
Use a small offset spatula to crumb coat the sides of the entire cake and let it chill in the fridge.
-
Remove your cake from the fridge then re-level the top to ensure that each cube is the same height and is completely flat.
-
Crumb coat your entire cake now then place it back in the fridge to chill. Remove your cake and ice the entire cake once more and chill it again.
-
Roll your red and black fondant into two sheets. Measure the sides of your cake then measure out 4 bands (long enough to wrap around). Cut each band to the same width of the sides of the cake.
-
Add the fondant to the sides of the cake and smooth it out. Trim away any excess.
-
Once all the four sides are on, use an offset spatula to fill and level the top of the game with IMBC.
-
Roll out a sheet on fondant large enough for the surface of your cake then lay it on top.
-
Mark a grid pattern on the top of your cakes - halfway lines first then horizontal and vertical lines.
-
Roll out thin dull yellow fondant then cut it into ⅛” strips. Lay the strips onto the grid lines you made and glue them down with clear piping gel. When laying the lines in the opposite direction, trim the lines where they overlap with an Xacto knife so the lines lay flat. Chill your cake if necessary.
-
Mix some gold lustre dust together with some clear food grade alcohol then paint the yellow strips and allow them to dry. Don’t worry if you get the paint on the fondant because you will be covering it in the next step.
-
Measure the width of the borders (around the yellow grid lines) then cut strips from black fondant of the same width. Cut away the excess red fondant then add the black strips around the four sides. Trim the corners in an angle.
-
Measure the space between the gold lines then cut square from your red and black sheets of fondant. Glue the squares down with clear piping gel in between the gold lines in a checkerboard pattern. You may need to trim the squares as you go.
NOTE: Make sure that your red and black fondant are the same thickness as the yellow grid lines so they lay flat together. You may have to reroll the fondant like I did.
-
Pop your candy melt checkerboard pieces out of the molds and it’s time to play!
Congratulations you did it!
