Watermelon Sugar Cookie Ice Cream Sandwiches


Cookie , Ice cream , Recipes , Sugar cookies , Watermelon
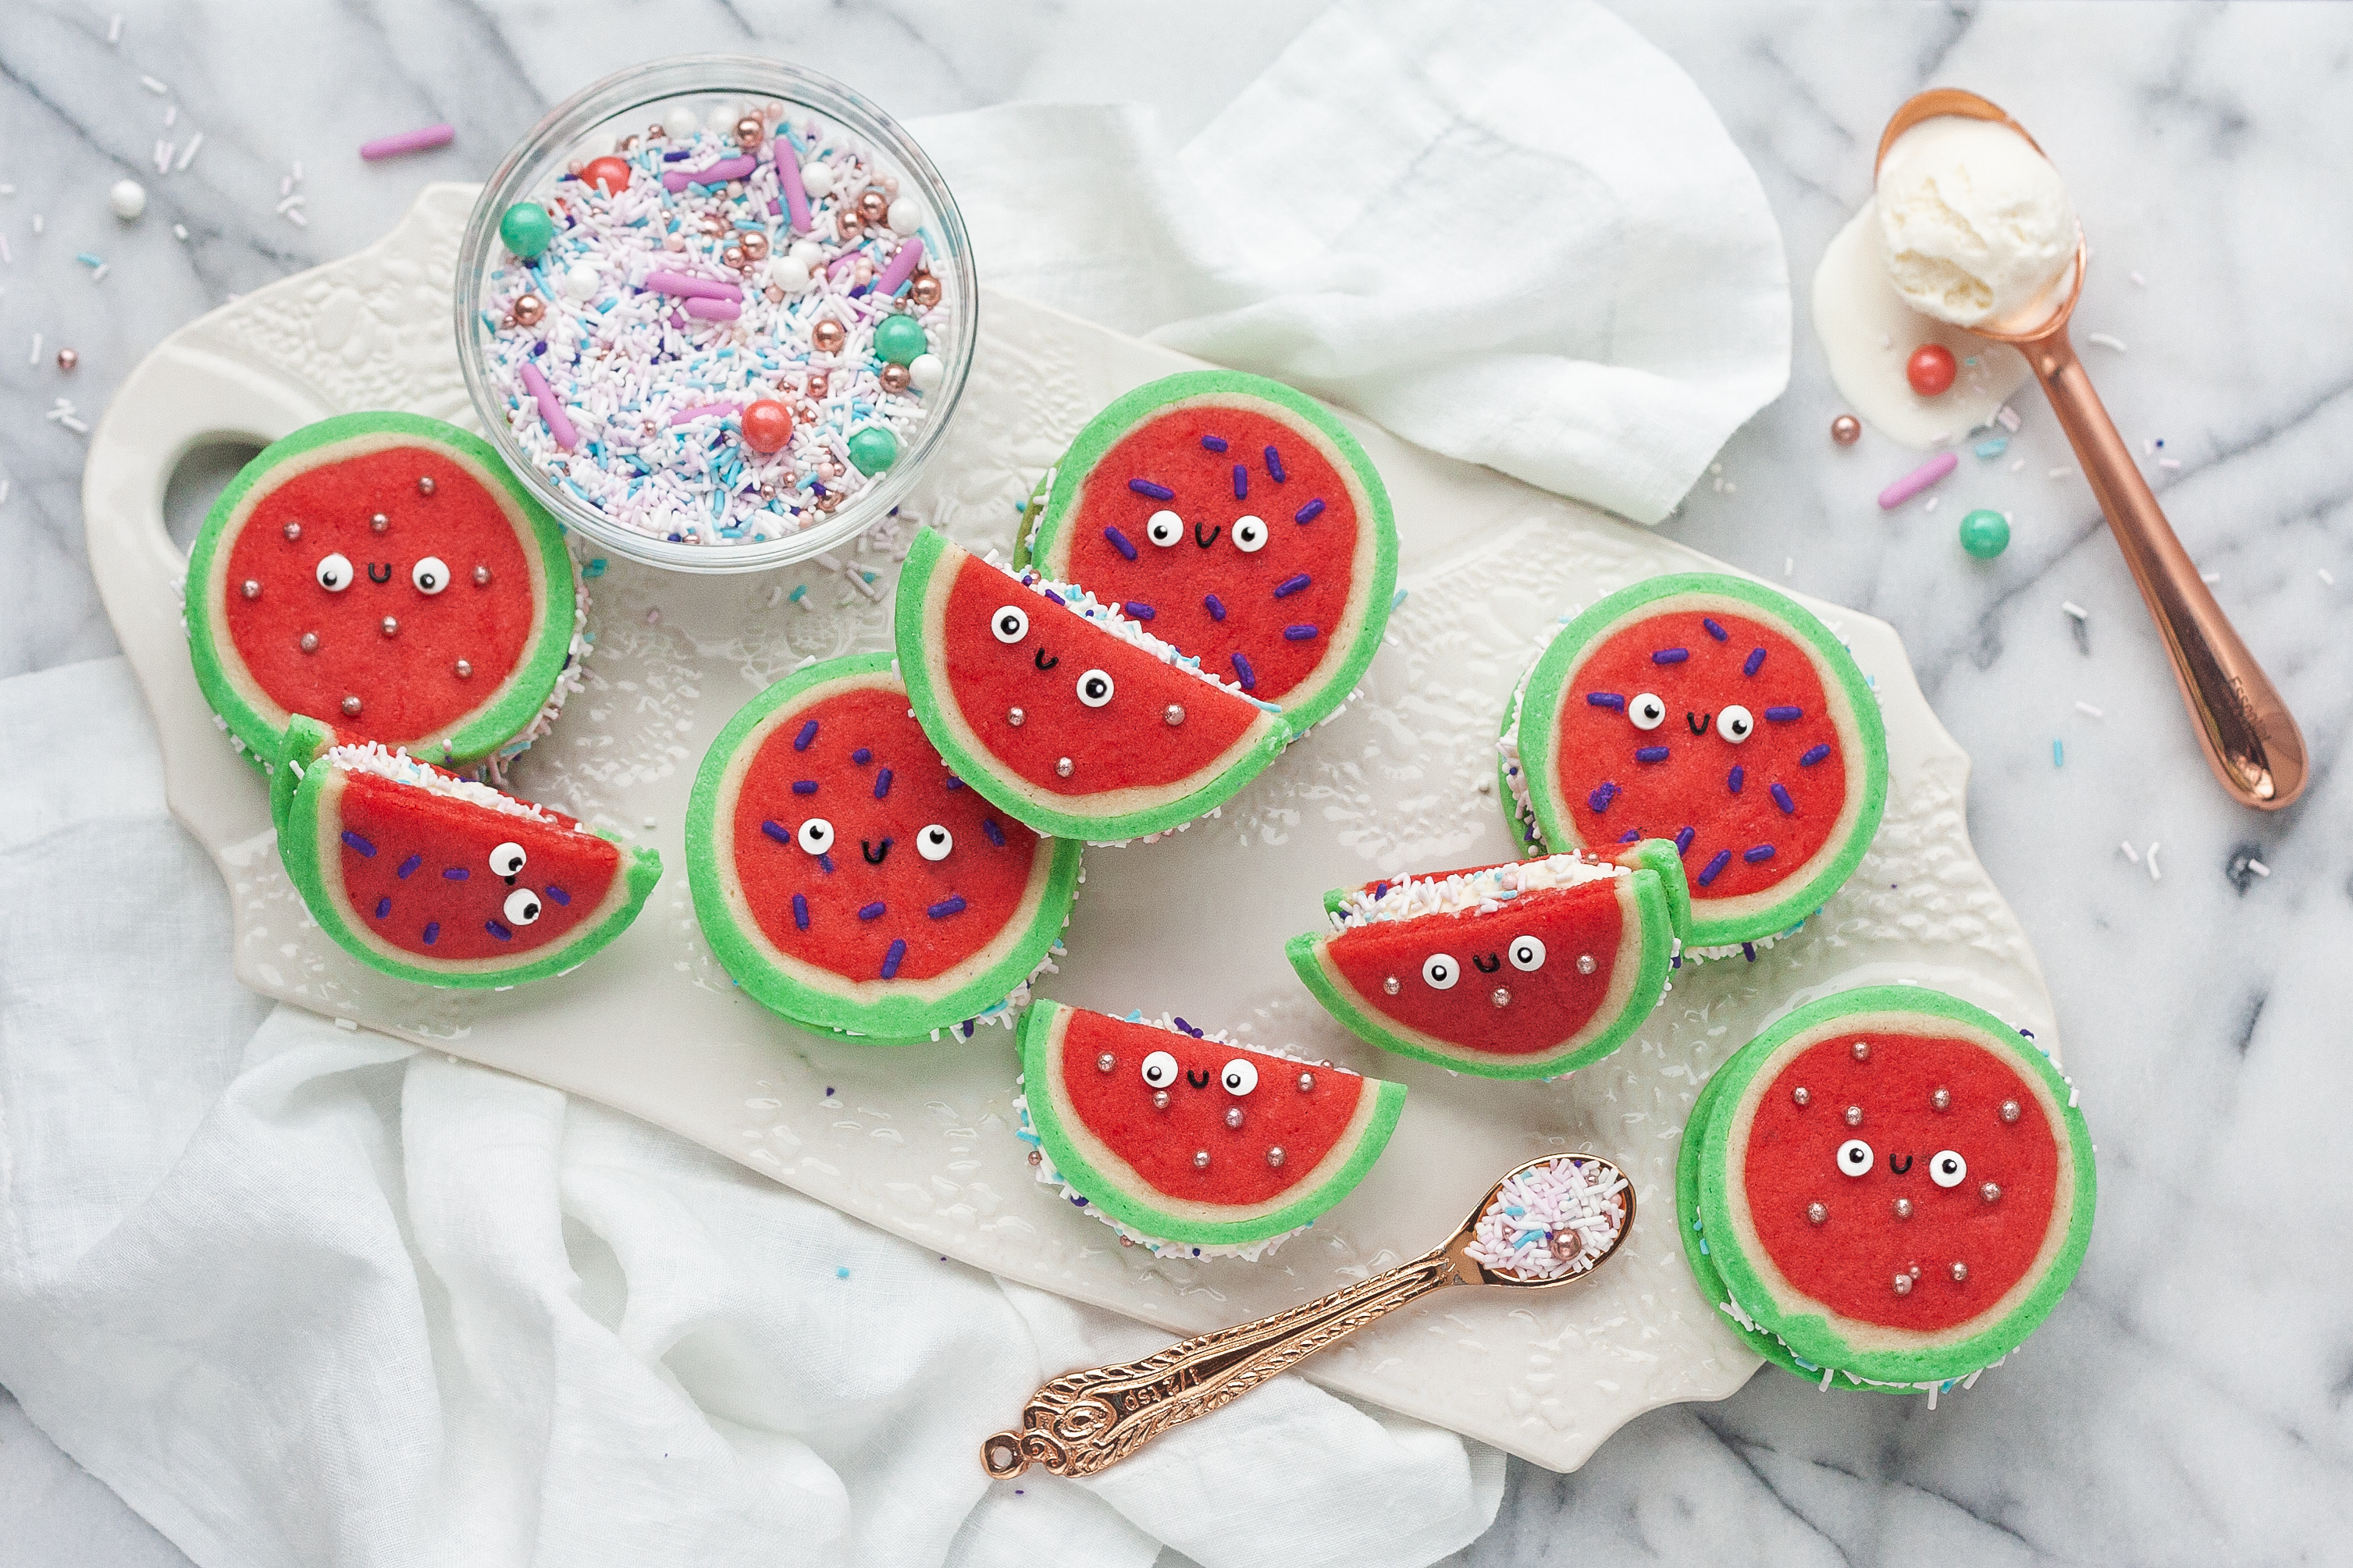
Love the idea of watermelon, but looking to create something a little more rich and decadent? Here at How To Cake It we love fruit as much as the next guy, but for dessert? Watermelon is something like 92% water, and while refreshing, hydrating, and necessary to sustain human life, I think we can all agree- water is not a dessert. Our solution is these fantastic Watermelon Sugar Cookie Ice Cream Sandwiches- inspired by watermelon and days spent chasing after ice cream trucks. Sprinkles stand in for watermelon seeds, cute eyes if you want to make little faces, and even decorate the exposed ice cream. Because we’re not just making a more decadent tasting watermelon themed treat, we’re making it fancy. Take that, fruit.


Ingredients
Watermelon Sugar Cookies
- 4 1/2 cups all-purpose flour
- 1 teaspoon baking powder
- 1/2 teaspoon salt
- 1 1/2 cups unsalted butter, softened
- 1 1/2 cups unsalted butter, softened
- 2 large eggs
- 1 tablespoon vanilla extract (or substitue 1 teaspoon of your favorite extract)
- Red and green icing gel colors (I also used teal and ivory to better match the sprinkles)
Assembly & Watermelon Decorations:
- Vanilla Ice Cream
- Glow Up sprinkle mix
- Black royal icing fitted with small, round piping tip
- Mini sprinkle eyes (optional)
Read It!
-
This cookie dough works best when it’s kept very cold. If it starts to get too warm or sticky just pop it into the freezer for 5-10 minutes.
Freezing the cookie slices right before baking helps prevent them from spreading. You can also roll the baked cookies inside a circle cookie cutter immediately after removing them from the oven if you want to make sure the shapes are perfectly round.
If you’d like to cut any of your watermelon rounds in half (or quarters) it’s best to do this after, instead of before, baking. This helps to keep the halves even and prevents you from losing the shape.
-
In a medium size mixing bowl, whisk together the flour, baking powder, and salt. Set aside.
-
In a stand mixer, use the paddle attachment to cream the butter and sugar on medium speed for 3 minutes.
-
Add the eggs and vanilla to the butter mixture. Mix on low until incorporated.
-
Add the flour to the wet ingredients and mix on the lowest speed just until the batter begins to come together into a dough.
-
Remove 1 cup of the dough (loosely packed) and set aside. We won’t be coloring this section. Remove 1 ¼ cups more of dough (loosely packed) and color this portion green (I added a little teal as well to make it a cooler hue). Color the remaining dough red (I added a little ivory to make it slightly more coral, like the sprinkles).
-
Shape the red dough into a 9-inch-long log and wrap with plastic wrap. You can set it in an empty paper towel roll that’s been cut open (across the top) to help keep the rounded shape.
-
Roll the white and green doughs into 9-inch rectangles between sheets of parchment paper. To figure out how wide to roll the dough, wrap a piece of string around the red log to find the circumference.
-
Transfer all 3 doughs to the refrigerator to chill for at least 2 hours.
-
Wrap the white dough around the red log, pressing it firmly along all sides. You can roll the dough to smooth it out and remove any air pockets. Trim any excess off of the sides and use it to patch up any necessary areas along the sides and seam.
-
Repeat this process with the green dough then wrap the entire log again and transfer to the freezer for at least 1 hour. You can also make the dough ahead of time and keep it frozen until you are ready to bake and assemble.
-
Preheat the oven to 350°F. Remove your chilled dough and slice each cookie ¼” inch thick (you should get about 20-24 cookies).
-
Arrange the cookies onto a parchment lined baking pan, about an inch apart, and add either the purple jimmies or small gold sprinkles to the top of the red dough (pressing down slightly) for the watermelon seeds.
-
Transfer the cookies to the freezer for 10 minutes.
-
Once chilled, bake the cookies for 9-12 minutes or until the edges are just starting to set. Since we will be freezing the completed sandwiches, it’s best to underbake the cookies a bit so they stay soft.
-
Allow the cookies to cool for 5 minutes on the pan before transferring them to a wire rack to cool completely. Now is also the time to cut the cookies if you want to turn the rounds into halves or quarters. Be careful as the pan will be very hot.
-
Use a small cookie scoop to add ice cream to the bottom side of half of the cookies. Place another cookie (sprinkle side up) on top, pressing down gently. You could also spread softened ice cream in a wax paper lined baking dish, freeze, and use a round cookie cutter (about the same size as the cookies) to cut out circles of ice cream. Add a little of the Glow Up mix to a shallow bowl or plate and roll the sides of the sandwiches in the sprinkles (you can also use a spoon to add sprinkles to the sides, while holding the sandwich over the bowl, if your ice cream is soft). Transfer all the assembled cookie sandwiches onto a wax paper or parchment lined baking tray.
-
Use the royal icing (or melted chocolate) to attach the sprinkle eyes and pipe the mouth in between. To add even more personality, I like to attach the sprinkle eyes with the blank side facing up so I can also pipe on my own eye shapes. If the ice cream is getting too soft you can transfer the entire tray to the freezer and remove the sandwiches 1 at a time to decorate. Freeze the fully prepared ice cream sandwiches for at least 1-2 hours more before serving. Enjoy!
-
Extra cookie dough and assembled cookie ice cream sandwiches should be stored in the freezer. Allow the sandwiches to freeze for 1 hour on a baking tray before individually wrapping them with plastic wrap, or in airtight containers.
Congratulations, you did it!
