Cheesecake is undeniably delicious, but for all the work it takes, it can feel a little basic. And while there’s nothing wrong with the basics, sometimes we want to bake to impress! Or to delight the rainbow loving diva in our lives.
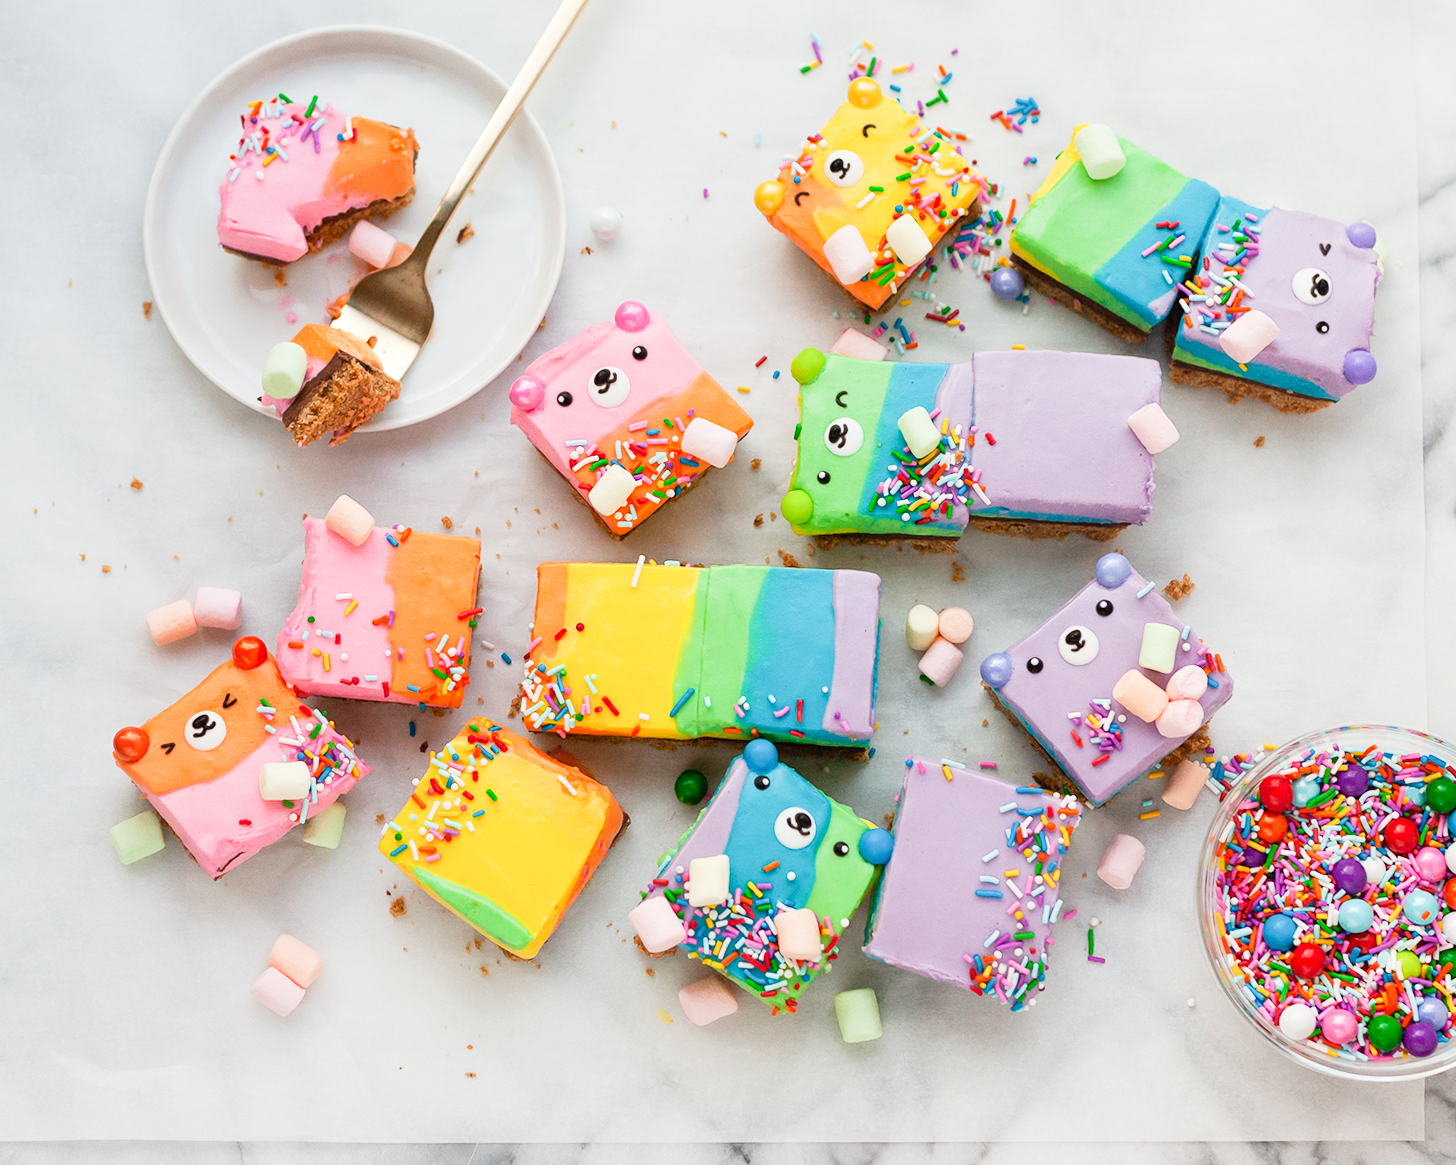
So we took the idea of cheesecake, added rainbow coloring, S’mores flavors, a delicious layer of chocolate ganache AND we made it no-bake. So you can blow minds without toiling over a hot oven. Then we kick it up a notch with adorable chocolate & sprinkle bear faces on each bar. Less work, more pizazz, now that’s what we call a win-win. A delicious, dramatic, vibrant win-win.

Ingredients
Graham Cracker Crust
- 1 ½ cups graham cracker crumbs
- 6 tablespoons salted butter, melted
- 2 tablespoons brown sugar (optional)
Chocolate Ganache Layer:
- 4 ounces baking chocolate wafers or bar, chopped into small pieces
- 4 ounces heavy whipping cream
S’mores Cheesecake Filling:
- 2, 8-ounce blocks of cream cheese, softened
- ¾ cup powdered sugar
- 7 ounces marshmallow creme
- 1 teaspoon vanilla extract
- 7-10 drops Jenna Rae Liquid Magic Mallow (adjust to your taste)
- ¾ cup heavy whipping cream
- Pink, orange, yellow, green, blue, and purple icing gel colors
Decorations
- Dark cocoa wafers or chocolate chips
- White chocolate melting wafers or chocolate chips
- Ultimate Rainbow sprinkle mix
- Mini, colorful marshmallows (optional)
Read It!
-
Because of the amount of cream cheese in this recipe, make sure it’s soft to avoid lumps when mixing. I take mine out of the refrigerator at least 45 minutes ahead of time. If at any point you do have lumps, just keep mixing until smooth (an immersion blender works great for this).
If you prefer a less sweet dessert, leave the sugar out of the crust, and use a higher percentage of cacao for the chocolate ganache (I used 74%).
Smaller pieces of chocolate make it easier for the ganache to melt quickly and smoothly. Chocolate chips aren’t great here as they don’t melt as nicely and can change the consistency.
Play around with the colorful cheesecake layer- instead of adding colors 1 at a time (like I did), you can dollop the different colors all over the top of the ganache and use a butter knife to gently mix them together (being careful not to over blend or it muddies the colors).
The freezer works best for setting up this recipe vs the refrigerator because the marshmallow creme keeps the cheesecake layer so soft, but you can store the bars in the refrigerator after they are set, if you prefer them softer. I like to keep mine in the freezer and remove them for a bit before eating (the freezer can make the crust and chocolate ganache layers a little harder, but they soften again once left out at room temperature).
-
Line a 9x9” baking dish with enough parchment paper so it covers the bottom with overhang on the sides (you will use the sides to pull it out of the pan before cutting).
-
Crush the graham crackers in a food processor until they become a fine crumb. Then mix them with the melted butter, salt, and sugar until they become a wet, sandy texture. Pour the crumbs into the bottom of your baking dish. Use the bottom of a measuring cup, or the palm of your hand to firmly press the crust in place.
-
Transfer the crust to the refrigerator while making the ganache.
-
Chop the chocolate into small pieces and place in a heat-proof bowl.
-
Heat the heavy cream on the stovetop, over medium, until it comes to a simmer (being careful not to let it go to a boil).
-
Pour over top of the chocolate and let sit for 3 minutes, without stirring.
-
Then gently stir until smooth and velvety. Pour over top of your chilled crust layer and spread it out with a spatula. Return to the refrigerator.
-
Place the softened cream cheese in the bowl of your electric mixer, and mix on medium for 2-3 minutes, or until smooth. Add the powdered sugar, marshmallow creme, vanilla, and Liquid Magic Mallow (starting with 7 drops and increasing after you taste) to the cream cheese and mix for another 1-2 minutes or until everything is evenly incorporated.
-
With the mixer on low, very slowly add the heavy cream (this is to prevent lumps) and slowly increase the speed to medium high. Mix for an additional 4-5 minutes, or until the cream cheese mixture is light and fluffy and forms soft peaks.
-
Evenly divide the cheesecake filling between 6 small bowls. Add a little of the pink, orange, yellow, green, blue, and purple coloring to each of the bowls and mix until the color is evenly combined.
-
Pipe or spoon each color of the cheesecake filling over the ganache- in any order and design you’d like. You can also mix the colors together for more of a marbled look. Cover with plastic wrap and transfer back to the freezer. Allow to set for at least 6 hours (you can prep the decorations while waiting ☺).
-
Melt the white chocolate wafers in the microwave, in a heatproof bowl, in 30-second intervals, at 50% power, stirring between each interval until smooth and fully melted. Use a toothpick dipped in the melts to draw small circles for each bear’s snout onto a sheet of wax paper (you can place a drawing underneath as a guide).
-
Repeat the melting process with the dark chocolate wafers, and draw the bear’s eyes on the wax paper, then the noses/mouths on top of the snouts you just made. Allow to set.
-
Remove the baking dish from the freezer. Pull the cheesecake out of the pan using the sides of the parchment paper and evenly cut into 16 squares. Top each with the chocolate bear face details. Place the large round sprinkles, from the Ultimate Rainbow mix to each side of the bar for the bear’s ears. Decorate with more of the Ultimate Rainbow sprinkles and the mini marshmallows. Any leftovers can be stored in an airtight container, or well wrapped, in the freezer.
Congratulations, you did it!


