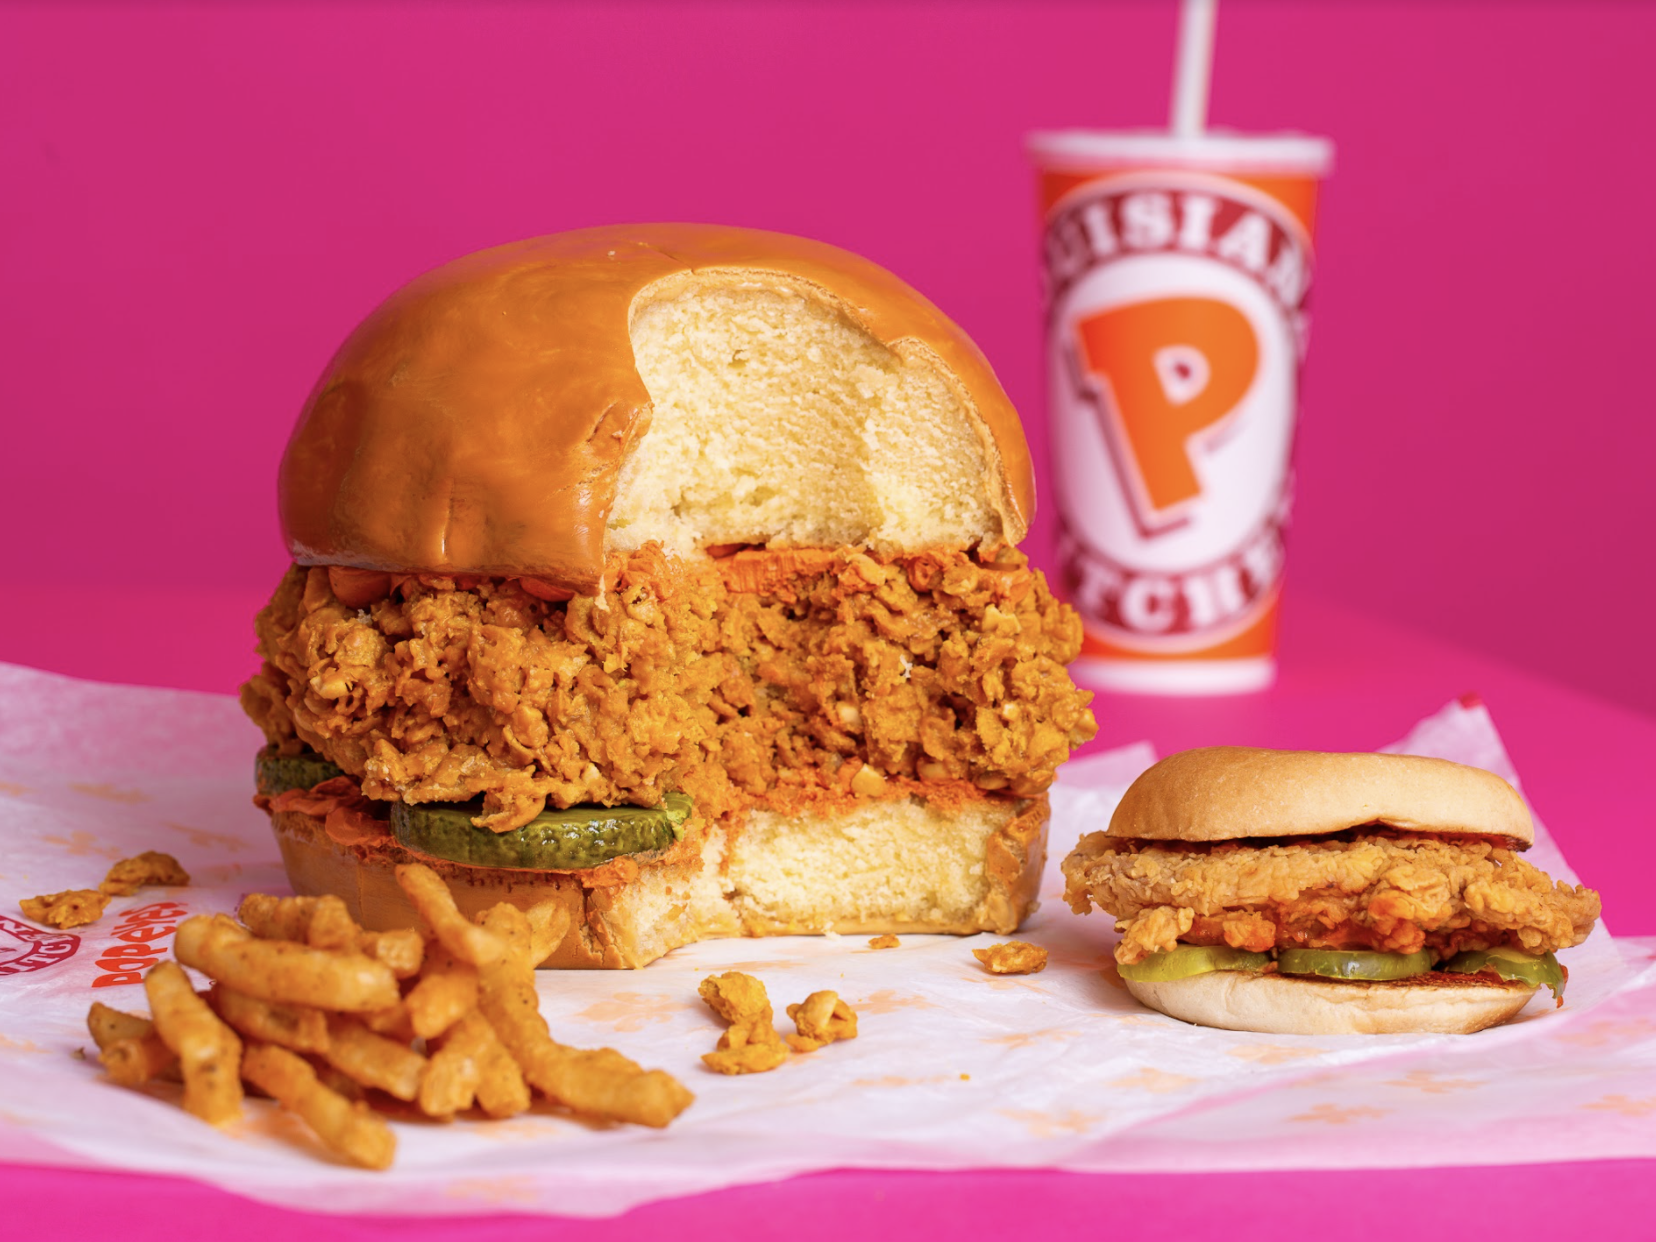
Popeye's Chicken Sandwich Cake


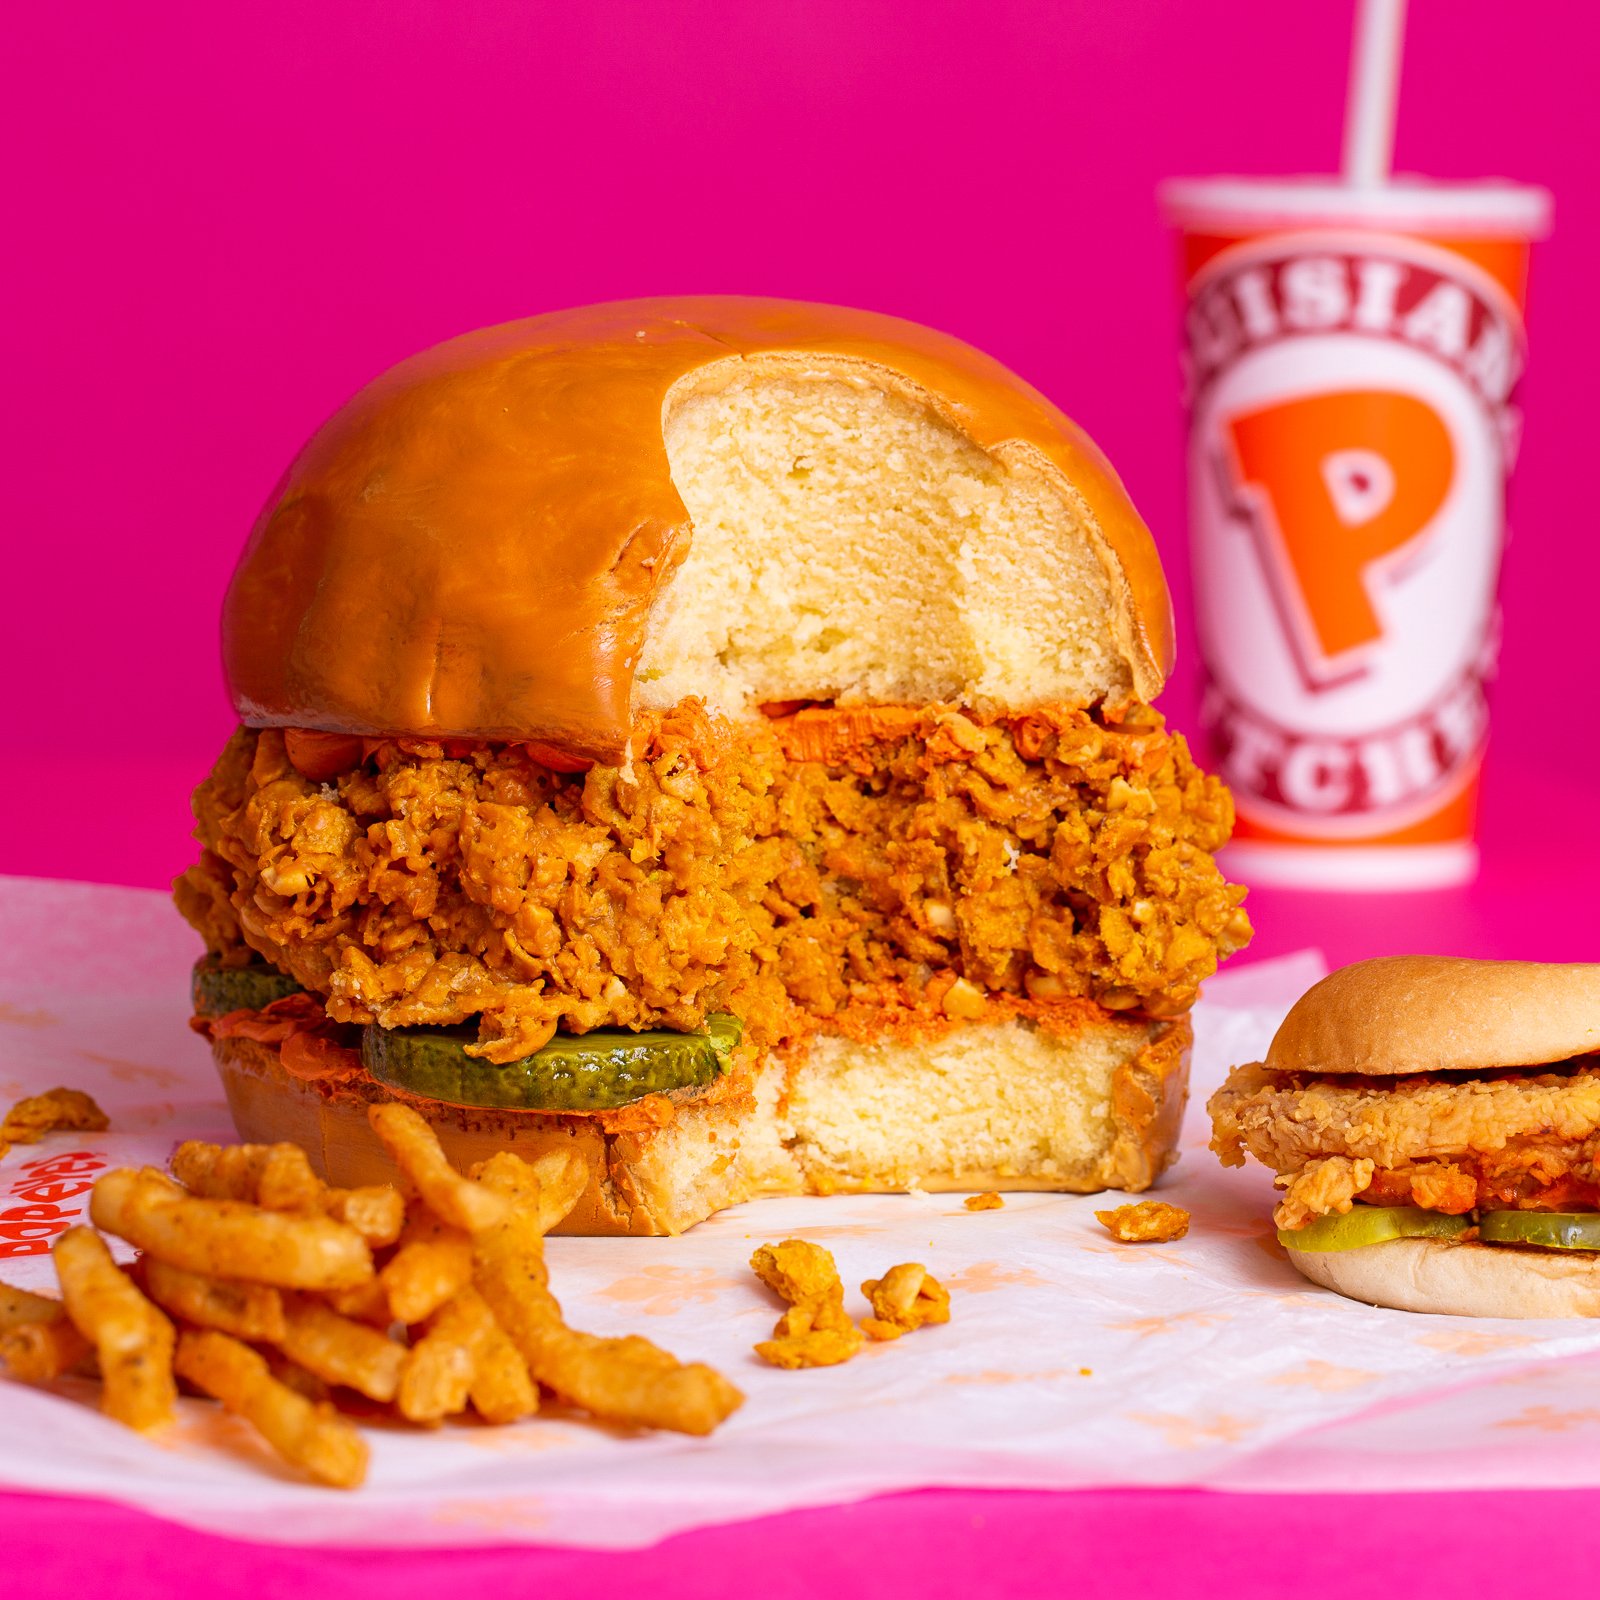
This cake POP(eye'd) Off! Popeye’s released a brand new chicken sandwich last August and it immediately popped off! People went crazy for their delicious sandwich to the point where it literally became sold out everywhere! So if you missed your chance to get the real deal, this is your opportunity to bring it back to life in cake form!
Starting off with 4.5lbs of my Ultimate Vanilla Cake, this Popeye’s Chicken Sandwich is covered in a tan fondant and features the same light glaze over it’s bun. Their signature fried chicken is made of a sweet and crunchy peanut butter cereal mix which is then topped off with fondant pickles and spicy mayo made of buttercream dyed a light cream orange.


Ingredients
Cake
- 4.5lbs Yo’s Ultimate Vanilla Cake
Icing
- 1 batch of simple syrup
- 1 batch of Italian Meringue Buttercream
Decorations
- 1lb tan fondant (bun color)
- 4oz green fondant (pickle color)
- Red color dust
- Cinnamon
- Piping gel
- Gel food coloring: ivory, avocado, taupe, moss green, bitter lemon, white, yellow
- Clear food grade alcohol
Cereal Bar Mix
- ½ cup unsalted butter
- ½ cup corn syrup
- 1 cup brown sugar
- 1tsp vanilla
- ½ cup crunchy peanut butter
- Gel food coloring: ivory, yellow, red

Tools
- 6" round cake pan
- 7" round cake pan
- Sir Squeeze A Lot
- Parchment paper
- CMC (optional)
- Circle cutters
- Turkeyskinator or Rubber Drawer Liner
- Paint Brush
- Sculpting Tool


Read It!
-
Line your pans with parchment paper then preheat your oven to 350 degrees Fahrenheit. Bake your cakes as follows:
6” round cake → 2lbs vanilla cake → 1 hour and 20 minutes
7” round cake → 2.5lbs vanilla cake → 1 hour and 25 minutes
TIP: Let your cakes cool completely in their pans.
-
Remove your cakes from their pans. Layer your 7” cake into two (cutting 1” from the bottom). Level the 6” cake at 2.5” from the bottom.
-
Carve your 6” cake into the top bun by rounding off the edges until you are satisfied with the shape. Leave the caramelization on the bottom as if the bun were toasted.
-
Place your top bun over one of your 7” cake layers then use a small serrated knife to cut around it - removing the caramelization. Now carve and round the edges out to make the bottom bun.
-
Use Sir Squeeze A Lot to soak your layers of cake in simple syrup. Let the layers sit for a couple of minutes.
-
Ice your buns with piping gel.
-
Roll out your “bun” colored fondant (I mixed yellow, tan, white, and ivory) nice and thin then cover the bottom bun - trimming away any excess. Roll out more fondant for your top bun then repeat the same steps. Crinkle and pinch the fondant with your fingers to give the top more texture. Trim all excess away flush on both buns.
-
Use a sculpting tool to scratch the edges of the top bun where it would meet the bottom bun.
-
Mix together ivory and taupe gel food coloring, clear food grade alcohol and a bit of piping gel (to retain some of the shine). Paint the buns with the mixture then let it dry and paint again if necessary.
-
Roll out your pickle green fondant (mix of white, yellow, and avocado) approximately ¼” thick. Use a circle cutter to cut out circles. Use a turkeyskinator (or a drawer liner) to texture the edges of the pickles. Set the pickles aside to dry for a bit or let them chill in the fridge.
TIP: Mix in CMC into the fondant if it’s too soft.
-
Once the pickles have set, it’s time to paint them! Mix all of your gel food coloring with clear food grade alcohol then paint the sides of your pickles as follows:
Bitter lemon with ivory
Dab on avocado
Dab on moss green
Splatter on white
Once you have painted on all four coats, blend the colors together with a dry paint brush. Top it off with a final coat of bitter lemon.
-
Mix brown sugar, corn syrup, and butter together in a saucepan; bring to a boil. Remove from heat and stir in peanut butter and vanilla extract until smooth. Color your mix using red, yellow, and ivory gel food coloring. Pour peanut butter mixture over cereal mixture; stir to coat.
-
Form your fries chicken pieces using the cereal mix to fit your bun. Leave the jagged edges for a more realistic look. Once you are happy with the shapes, let the fried chicken pieces set completely in the fridge.
TIP: Make extra patties just in case.
-
To make your spicy mayo, dye your buttercream using ivory and yellow gel food coloring then add in red color dust and a dash of cinnamon.
-
It’s time to assemble your chicken sandwich! Stack your sandwich beginning with the bottom bun, then adding on the fried chicken, pickles, and spicy mayo buttercream. Top your sandwich off with the top bun and you’re done!
Congratulations you did it!
