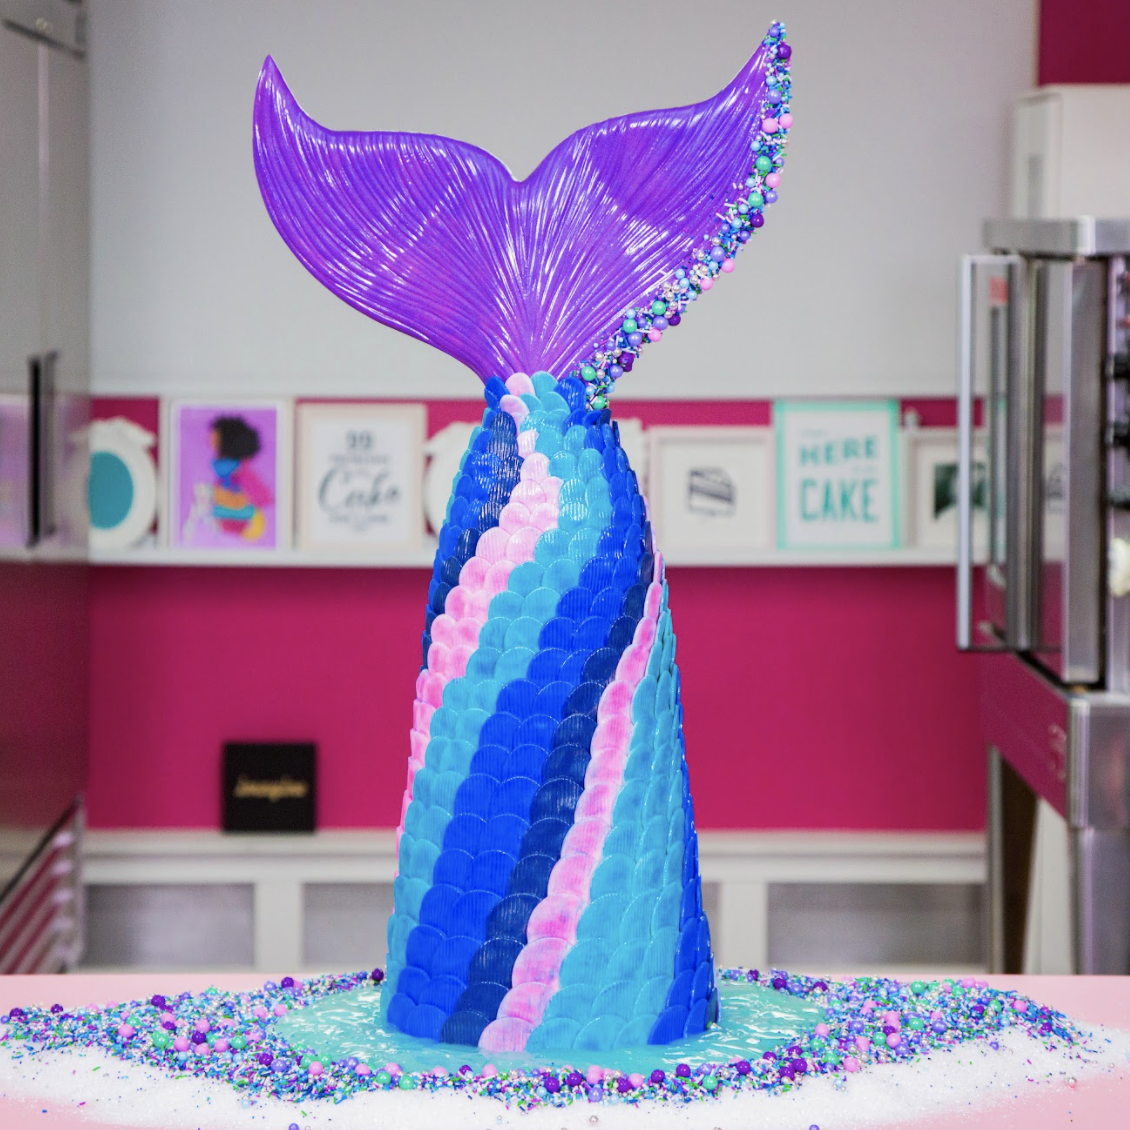
This mermagical vanilla cake is simply mermazing! I am so here for the mermaid trend YoYos. First of all, the beach is my favourite place to be, but all of the cool blues and bright purples mixed with all things that sparkle are just so magical. Or MER-magical I should say! There’s so many different things you could cake up around this theme, but to really bake it up a notch I’ve made something MER-mazing!
This giant mermaid tail started off as 18lbs of my Ultimate Vanilla cake, with half the batter dyed an ocean blue and half dyed a coral pink. Stacked and filled with Italian Meringue Buttercream, the tail gets scaled up with fondant, and hit with beautiful luster dusts for a truly mermaid worthy sparkle.

Ingredients
Cake
- 18lbs Yo’s Ultimate Vanilla Cake
- Pink Gel Food Coloring
- Blue Gel Food Coloring
Icing
- 3 x Yo’s Famous Italian Meringue Buttercream
- Simple Syrup
Decorations
- 2lbs Blue Fondant
- 2 ¼ lbs Teal Fondant
- 1 ½ lbs Pink Fondant
- ½ lb Navy Fondant
- Luster Dusts: teal, pink, silver, blue, purple
- Shortening
- Clear Food Grade Alcohol
- Piping Gel
- Sprinkles
Tools
- 9" Round Cake Pan
- 8" Round Cake Pan
- 7" Round Cake Pan
- 6" Round Cake Pan
- Simple Syrup Squeeze Bottle
- Large Offset Spatula
- Small Offset Spatula
- Oval Cutter Set
- Cake Board
- Dowels
- Paint Brushes
- Foam Board
- Sculpting Tools
Read It!
-
Prepare 18lbs of Yo’s Ultimate Vanilla Cake, dying half of your batter pink, and half blue. Make 1 set of each color, dividing your batter, and baking at 350 degress as follows:
- 3lbs - 9” round, 1 hr 30 min
- 2.5lbs- 8” round, 1 hr 25 min
- 2lbs- 7” round, 1 hr 20 min
- 1.5lbs- 6” round, 1 hr
-
Level all of your cakes, removing the caramelization from the bottom. Create 2 layers from each cake by cutting in half, and 3 layers from one of the blue 6” round cakes.
-
Shower all of your cakes with simple syrup so they stay moist through the decorating process
-
Stack your cake in 2 parts ( 9” & 8” together, 7” & 6” together) with Italian Meringue Buttercream, alternating colours as you go. Chill for 20 mins.
-
Stack your cake in 2 parts ( 9” & 8” together, 7” & 6” together) with Italian Meringue Buttercream, alternating colours as you go. Chill for 20 mins.
-
Insert dowels into your larger cake before placing your smaller carved cake on top
-
Continue carving your cake, making the 2 pieces join together seamlessly.
-
Crumb coat your cake with buttercream and chill for 20 mins before adding a final coat of icing, and chill once more.
-
Roll out your sheets of coloured fondant, and texturize with a textured rolling pin.
-
Use graduated oval cutters to create multiple sizes of scales in your different coloured fondants
-
Starting at the top of your cake, begin laying your smallest ovals in a pattern, working your way down to the bottom and up to your largest oval scales. Scales at the bottom of your cake may need to be trimmed.
-
With a printed mer-tail template as your guide, cut your tail out of foamboard.
-
Brush the entire surface of one side of your foam tail with piping gel, and cover with thinly rolled purple fondant. Flip over to trim away excess, and attach a sharpened dowel, making sure it will extend through your entire cake
-
Build up the front of your tail with additional pieces of fondant, making it thicker in the middle, before draping in another piece of thin purple fondant.
-
Use a dresden tool to create detailed lines on your tail. Mix together pink luster, clear food grade alcohol, and piping gel and brush over the surface of your tail.
-
While the piping gel on your tail is still wet, add a border of sprinkles up one side.
-
Paint the scales of your cake with coordinating luster dusts to add more sparkle and shine. I used silver on my navy scales. Paint piping gel from bottom to top to make everything glisten.
-
Carefully pick up your tail, and holding it mostly from the back, drive it through the top of your cake. Take your time when you get to the center board to wiggle it back and forth until it’s all the way through. Add more scales to the top if necessary.
Congratulations you did it!


