Menu
HOW TO CAKE IT
0
  • Shop
    • Gifts
    • Live Tutorials
    • Baking Tools & Ingredients
    • Sprinkles
    • Subscriptions
    • Books
    • Apparel & Accessories
  • Recipes
    • Classic Cakes
    • Buttercreams & Frostings
    • Simple Syrup
    • Novelty Cakes
    • Mega Cakes
    • Cupcakes & Cookies
    • Holiday Cakes
    • Conversion Chart
  • Subscriptions
  • Tutorials
    • Cakes
    • Cookies
    • Small Treats
    • All
  • Courses
    • Cake Decorating Foundations Program
    • FREE Cake & Icing Basics Program
  • Sale
  • Login
    0
    • Login
    HOW TO CAKE IT
    • Shop
    • Recipes
    • Subscriptions
    • Tutorials
    • Courses
    • Sale
    • Gifts
    • Live Tutorials
    • Baking Tools & Ingredients
    • Sprinkles
    • Subscriptions
    • Books
    • Apparel & Accessories
    • Classic Cakes
    • Buttercreams & Frostings
    • Simple Syrup
    • Novelty Cakes
    • Mega Cakes
    • Cupcakes & Cookies
    • Holiday Cakes
    • Conversion Chart
    • Cakes
    • Cookies
    • Small Treats
    • All
    • Cake Decorating Foundations Program
    • FREE Cake & Icing Basics Program
    Home › Recipes › Marvel Avengers Mini Cakes

    Marvel Avengers Mini Cakes

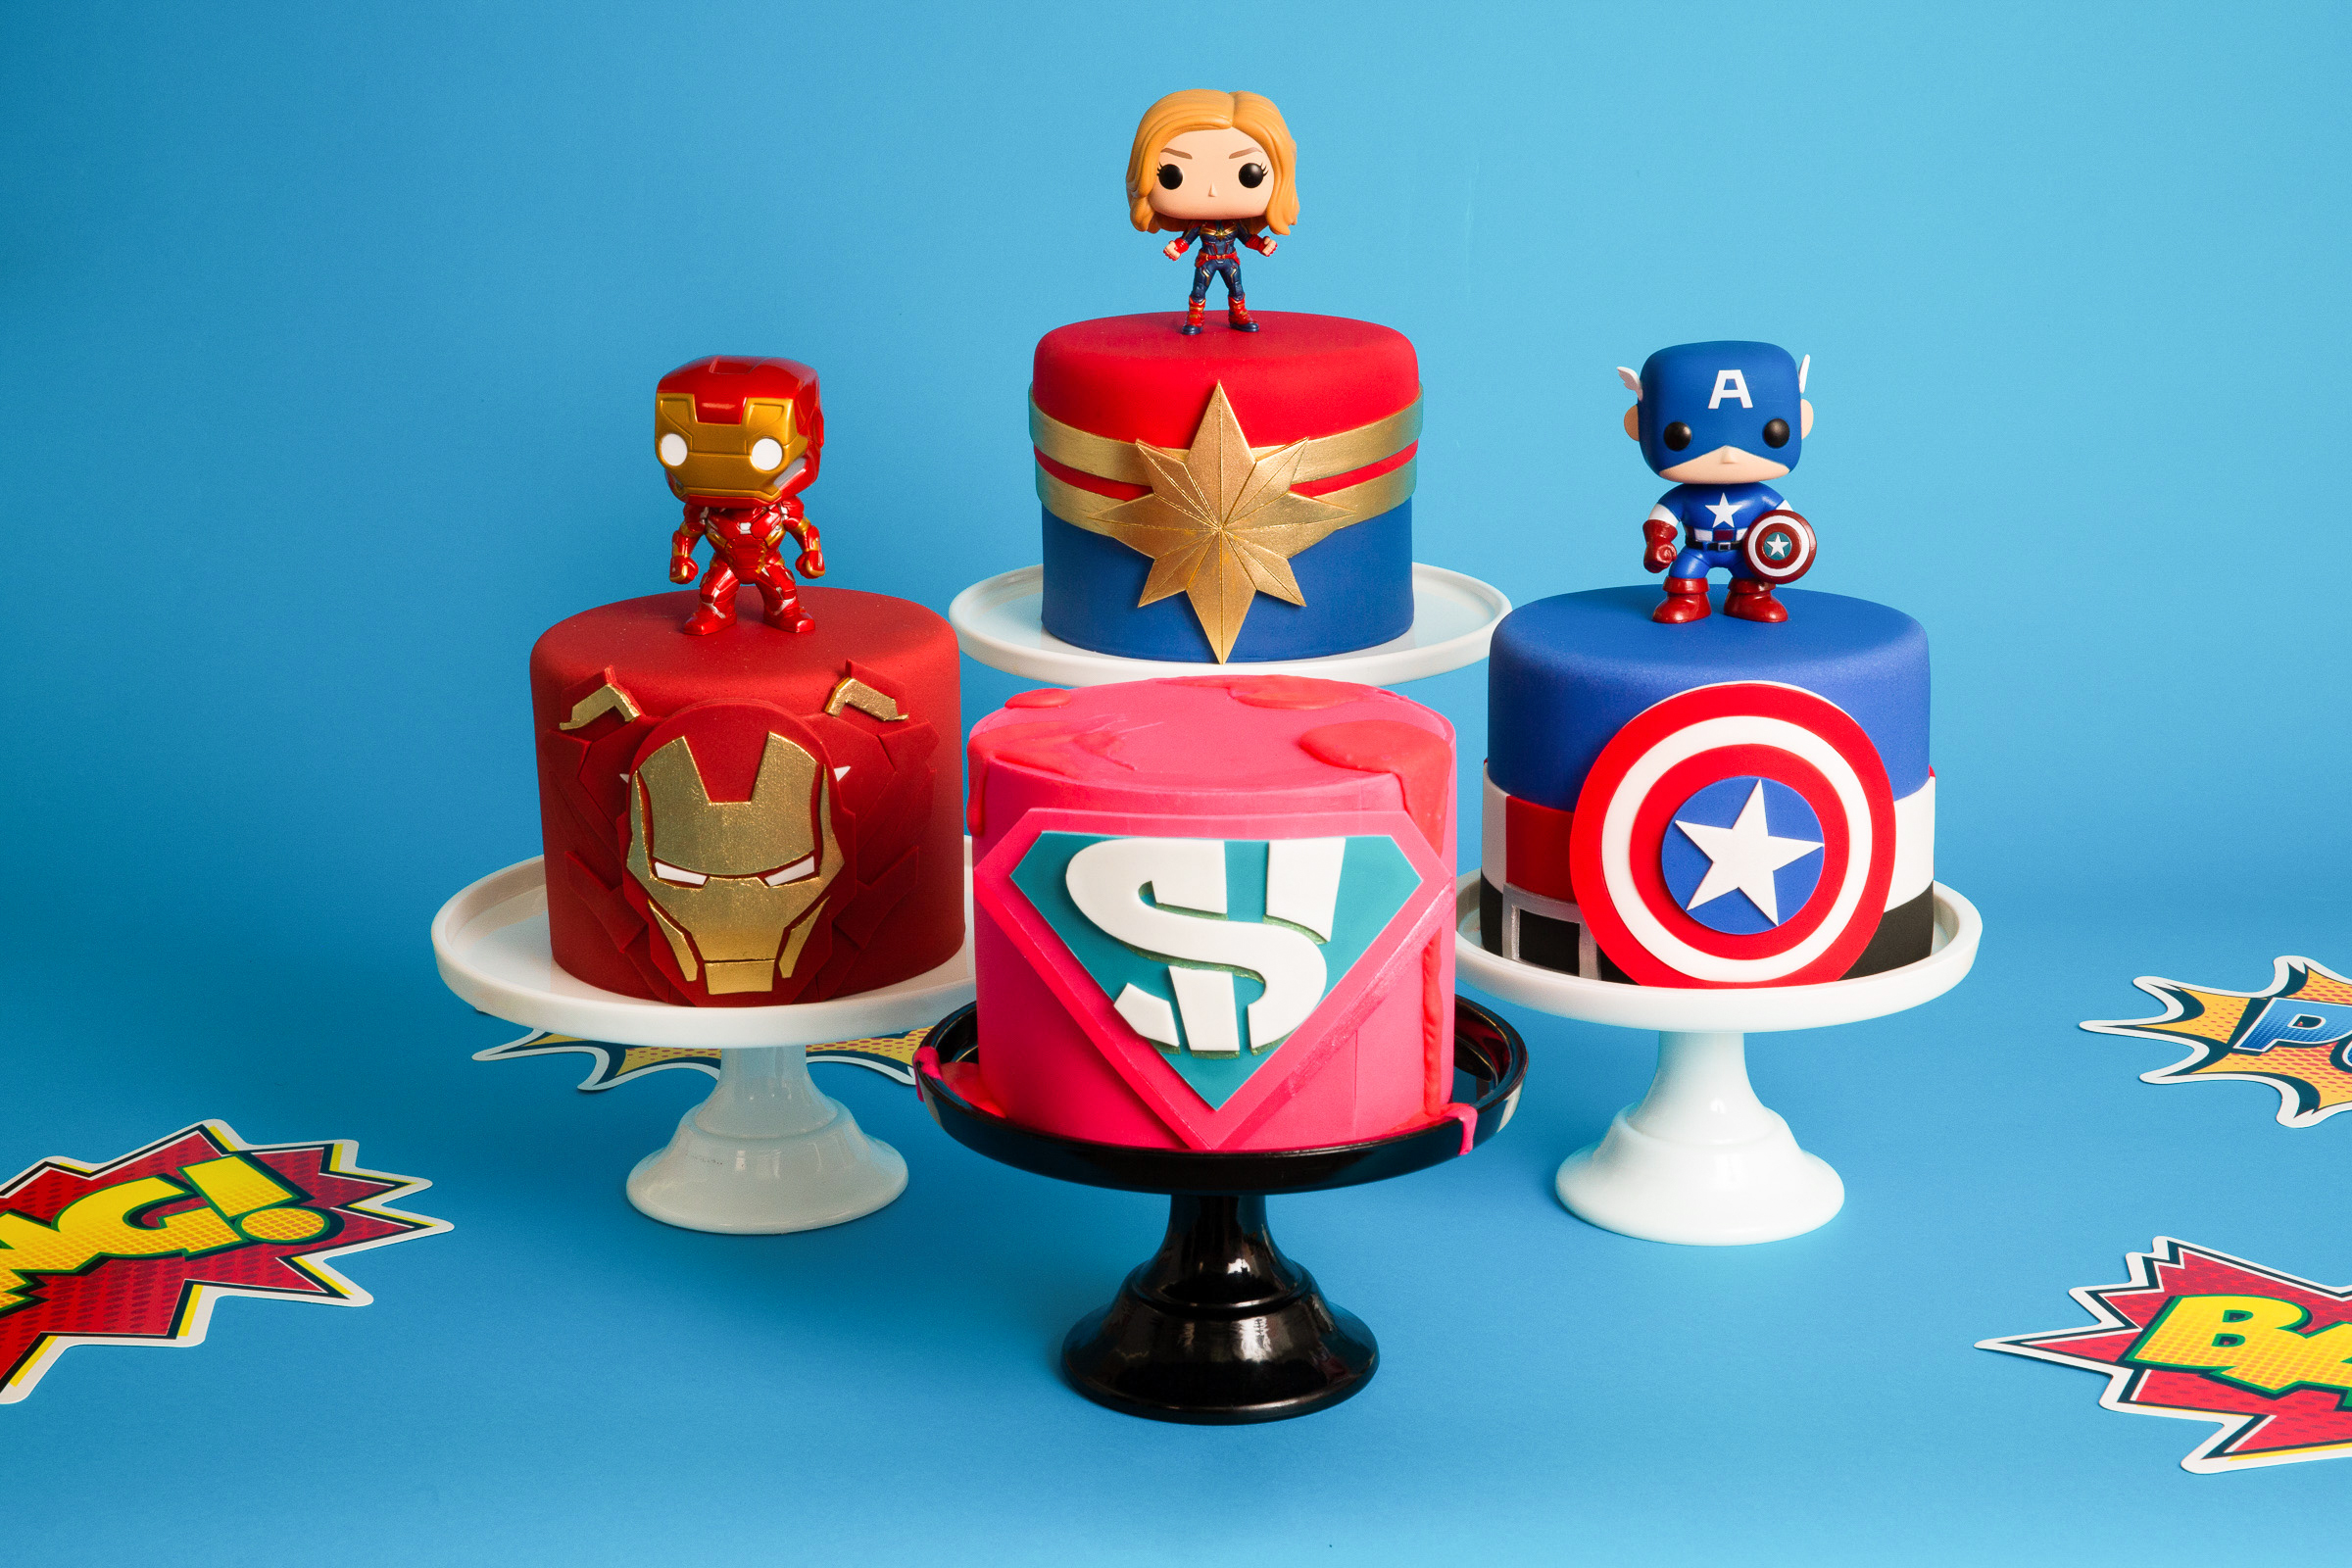
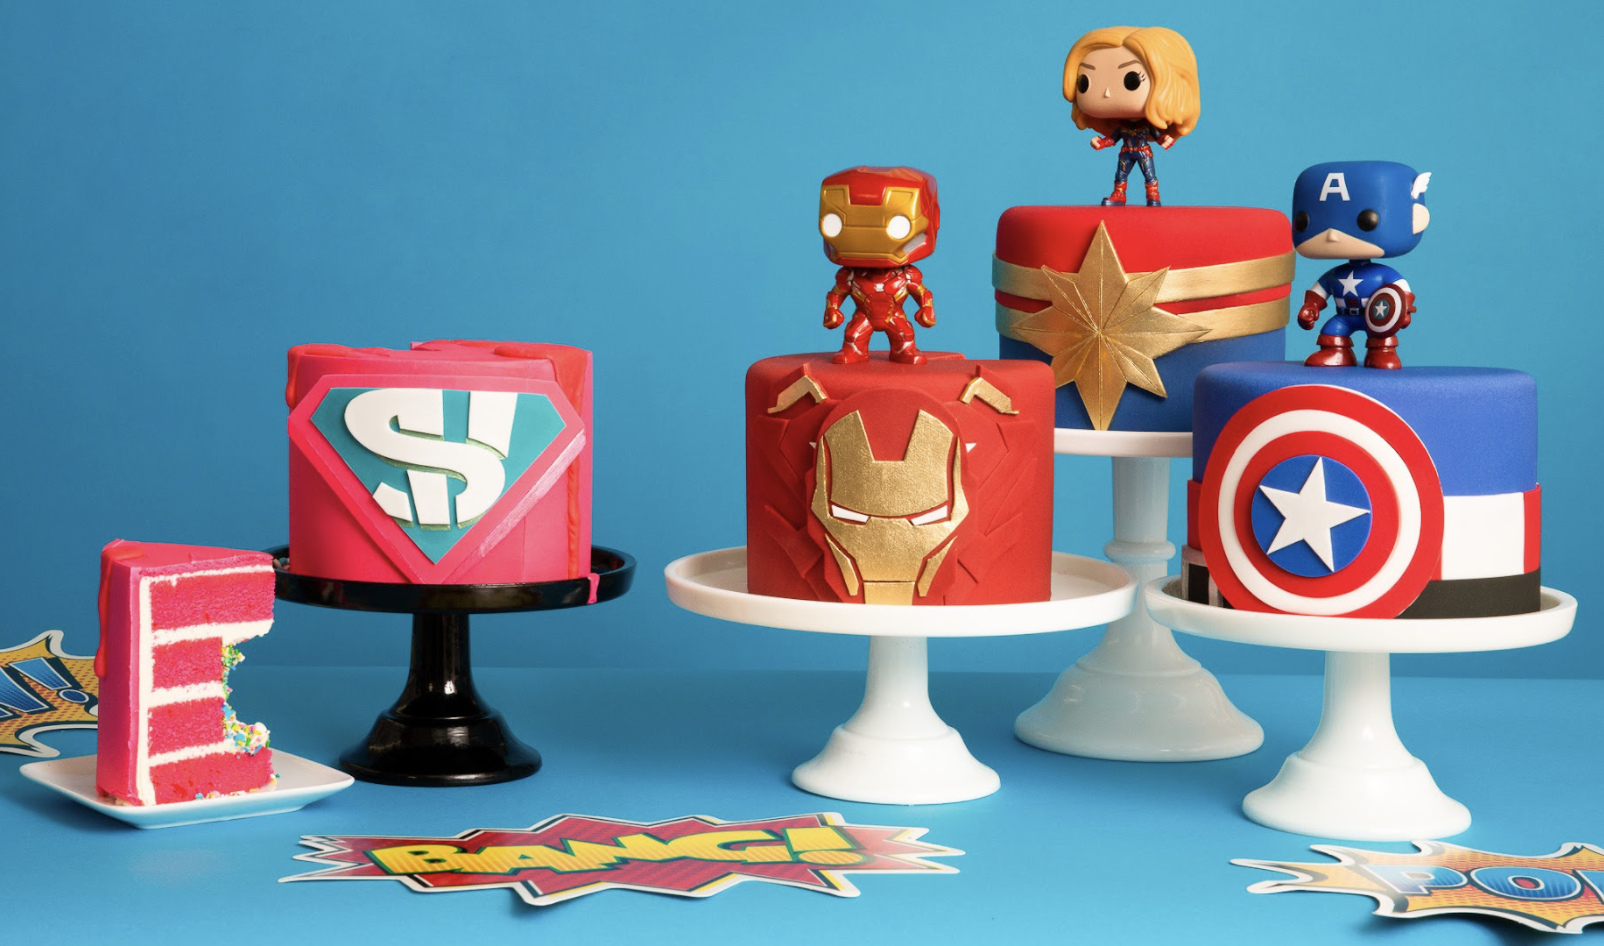
    These mini cakes are a BLAST!

    In true superhero fashion, I caked up some Marvel Avengers mini cakes and joined forces by premiering my SEAM HIDER costume. You’ve seen the seam hider help fix cakes all across the How To Cake It YouTube channel, but now there’s a costume and cake to go with her appearance too.

    Starting with 9lbs of my Ultimate Vanilla Cake dyed blue, red, maroon and yellow, these mini cakes are sure to save you from your cravings of CAKE! I’m stacking these cakes up with some Italian Meringue Buttercream and finishing it off with some maroon, blue cobalt, and blue fondant details.

    Blast over to my YouTube channel here!

    Share this recipe

    • Ingredients
    • Tools
    • Instructions

    Baking The Cake:
    9lbs Ultimate Vanilla Cake dyed blue, red, maroon and yellow

    Icing The Cake:
    Simple Syrup 
    Yo’s Famous Italian Meringue Buttercream

    Decorating The Cake:
     Red food colouring
     Blue food colouring
    Yellow food colouring
     Maroon food colouring
     1.5lb Maroon fondant
    1.5lb Blue (cobalt) fondant
     1.5lb blue fondant
    0.5lb red fondant
    0.5lb white fondant
    0.5lb black fondant
    0.5lb yellow fondant
     2oz grey fondant
    Gold lustre dust
    White lustre dust
    Silver lustre dust
    Clear food grade alcohol 
    Piping gel

    Item Name: Availability:
    6x 6” Circular cake Pan View On Parsel
    Simple Syrup Bottle Add to Cart - $24.99
    Ruler Add to Cart - $12.99
    Small Serrated Knife View On Parsel
    Small Straight & Offset Spatula Add to Cart - $14.99
    Large Straight & Offset Spatula Add to Cart - $19.99
    Parchment Paper View On Parsel
    Small paring knife View On Parsel
    Paintbrush View On Parsel
    Bench scraper Add to Cart - $9.99

    Bake Your Cakes

    Prepare all 9lbs of your Ultimate Vanilla Cake and divide into 6 equal portions; approximately 1.5lbs per portion. Dye one portion blue, one red, two maroon and two yellow. Bake at 350 degrees fahrenheit for 1 hour 5 minutes. Let your cakes cool completely in their pans.


    Level Down & Decaramelize

    Remove your cakes from the pan. Use a ruler and serrated knife to level your cakes and remove the caramelization from your cakes from the bottom of your cakes. Then, use a smaller cake pan to remove the caramelization from all the sides.


    Layer It Up!

    Once all of the cakes are decaramelized, layer each cake into two.


    Keep It Simple!

    Use Sir Squeeze-A-Lot to soak all of your cake layers with Simple Syrup.


    IMBC Coloring!

    Color your Italian Meringue Buttercream equal portions of blue, red and yellow.


    Build Your Cake

    In order to represent the various Marvel Avengers, use your maroon cakes with your yellow IMBC for Iron Man, yellow cakes with piped blue and red IMBC rings for Captain Marvel, alternate blue and red cakes and white IMBC for Captain America. 


    Crumb Coat & Chill!

    Crumb coat your cakes with a thin layer of buttercream, and chill for 20 minutes or until firm.


    Ice Ice Cakey!

    After you’ve removed your cakes from the fridge, apply another layer of Italian Meringue Buttercream onto the cake and create a smooth layer to get ready for decorating! Chill for another 20 minutes to firm up.


    Fondant Fun!

    For the Iron Man cake, roll out your maroon fondant to 1/8" thick, cover the maroon cake and smooth out with a fondant smoother. Repeat with for the Captain Marvel cake, roll out your blue fondant to 1/8" thick and cover the yellow cake. To finish off the Captain America cake, roll out your cobalt blue fondant to 1/8" thick and cover the blue and red cakes then smooth with a fondant smoother. Trim the excess of all the fondant on the cake.


    Captain America Fondant Details

    Roll out your black fondant into a "belt" until it's long enough to wrap the circumference of the Captain America cake. Then roll out your red and white fondant and cut out rectangles in the same size and apply them using piping gel above the black belt in alternating colours. Roll out the grey fondant, cut out a rectangle and then another rectangle in the center to create a belt buckle. Mix silver lustre dust with clear food grade alcohol and paint onto the buckle. Apply the silver belt buckle to the belt of the cake. 

    To replicate Captain America's shield, cut out a piece of white fondant using a circle cutter and place on top a red piece of fondant and cut a smaller circle out of the red circle. Repeat again for the white fondant, ending with a red circle in the middle. Then, use an even smaller circle cutter to cut a circle out of blue fondant and place in the center of the circle. Using a star template, cut a piece of white fondant in the shape of a star. Mix white lustre dust and some food grade alcohol, wait until dry and use piping gel to "glue" to the center. 


    Captain Marvel Cake

    Roll out red fondant and place on top of the blue cake. Using a template, trim the excess to create a high-low pattern on the red fondant. Roll out your yellow fondant and create 2 equal sized yellow bands using a ruler and a smaller paring knife that is long enough to wrap around the circumference of the cake. Flip the cake over and apply the yellow band just underneath the red fondant. Flip the cake right side up, place the same template around the cake again and add the second yellow band overtop the template. Make sure there's at least 1/4" space from each of the bands. In the front of the cake, use a Captain Marvel star template and cut out some yellow fondant to match and double the thickness by placing it on top of another piece of yellow fondant and cutting again. Then, score the points of the star using the tip of paring knife and a ruler.

    To finish off the cake, mix some gold lustre dust with some clear food grade alcohol and paint all of the yellow fondant details. 

    Tip: If you get your gold paint on a piece fondant that's not supposed to be painted, wait for it to dry completely then remove with some clear food grade alcohol. 


    Iron Man Cake

    Using a template of Iron Man's power source armour costume, trace overtop a rolled out piece of maroon fondant and yellow fondant details. Using a second template of Iron Man's face mask, trace overtop some more maroon fondant and cut out some white fondant details for the eyes and the power source. 

    Using gold lustre dust and clear food grade alcohol, paint all of the yellow fondant pieces gold and let dry. 

    Using piping gel, glue all of the parts of the power source and the face mask together. 


    Finishing touches!

    Using piping gel, glue Captain America's shield beside the belt buckle onto the cake. 

    Using piping gel, glue Captain Marvel's star onto the front center of the cake.

    Using piping gel, glue one half of Iron Man's chest piece to the cake. Then, use a strip of yellow fondant to separate the other half of the chest piece and glue with piping gel. Then use piping gel and center Iron Man's face mask to the middle of the cake. 


    Congratulations!

    Discover Us
    • About Us

    • Our Fans

    • Careers

    • Recipes

    • Blog

    • FAQ

    Learn More
    • Loyalty Rewards Program

    • Live Shopping

    • Baking Programs

    • Affiliate Program

    • Take Our Baking Quiz!

    • Press Page

    More Info
    • Our COVID-19 Plan

    • Shipping

    • Returns

    • Privacy Policy

    • Terms of Use

    • Contact Us

    © 2021 HOW TO CAKE IT. Powered by Shopify