Giant Bananas Cake


The most aPEELing cake! If you love giant fruit cakes (we’re talking cakes that look like fruit) as much as we do, these cakes will have you going bananas!
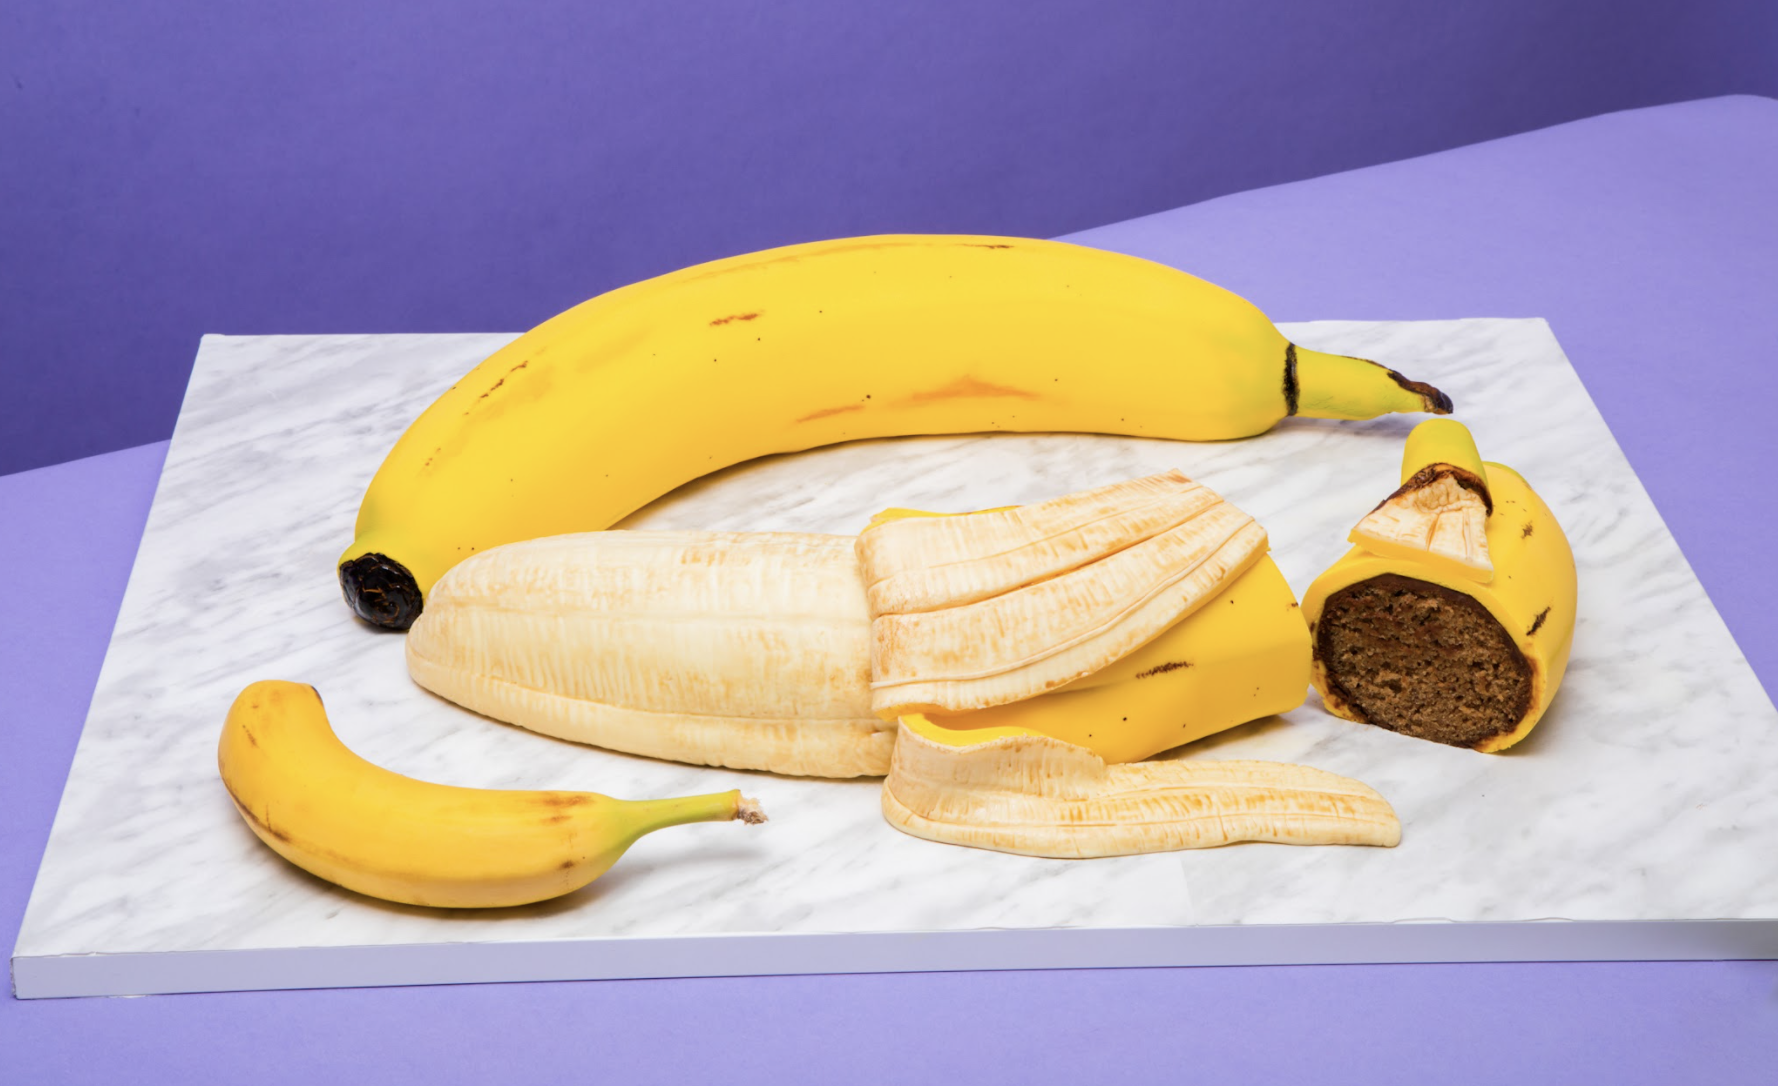
To make these giant banana cakes extra aPEELing, I stacked them with banana cake (of course) and a rich chocolate ganache (aren’t chocolate and bananas the best combo?). The cakes were covered in pale and bright yellow fondant to create the banana interior and peels then textured and painted with vanilla to create realistic ripeness.


Ingredients
Cake
- 16lbs of Yo’s Banana Cake
Icing
- 1 batch of Simple Syrup
- 1 batch of Chocolate Ganache
Decorations
- 4½lbs banana yellow fondant (for the peel)
- 1 lb banana fondant (for the fruit inside)
- Clear food grade alcohol
- Vanilla
- Citrine lustre dust
- Brown gel food coloring

Tools
- 2 x 11x15" cake pans
- Simple Syrup Squeeze Bottle
- Parchment Paper
- 1/2" Hollow Clear Dowel
- 3" Circle Cutter
- 3 1/4" Circle Cutter
- Small Serrated Knife
- Small Offset Spatula
- Veining Tool
- Clay Extruder
- Paint Brushes
- Fondant Smoother


Read It!
-
Line your pans with parchment paper and preheat your oven to 350 degrees Fahrenheit. Prepare 16lbs of Yo’s Banana Cake batter then divide it evenly into two 11x15” cake pans. Bake each for 1 hour and 40 minutes or until a toothpick comes out clean. Let your cakes cool completely in their pans before removing.
-
Remove your cakes from their pans then level each and remove the caramelization from the bottoms.
-
Use circle cutters to cut 3” and 3 ¼” circles from the cake sheets.
-
Use Sir Squeeze A Lot to soak all of your cake circles with simple syrup then let them sit for a couple of minutes to absorb.
-
Unlike a regular cake, these cakes will be assembled on their sides (so that the banana is laying down). Use chocolate ganache to glue your circle together with the smaller circles at the ends. You’ll need to cut some of your circles on a diagonal to get the curve of the banana. Repeat the same steps to create your second banana.
-
Use a small serrated knife to carve your cakes so that one looks like an unpeeled banana with more angled lines along the curve and the other like a peeled banana - smoother overall.
-
Crumb coat your cakes with chocolate ganache then chill them in the fridge until firm. Remove your cakes from the fridge then ice again but this time, create angles with the ganache on the unpeeled banana to resemble the lines on a real banana’s skin. Ice the peeled banana again creating angles only halfway up.
-
Roll out some pale yellow fondant super thin (about ⅛”). Cover the top of your peeled banana with the fondant then trim away any excess. Use a veining tool to create long lines along the length of the banana then add shorter horizontal lines in between the long lines. Place it in the fridge to chill.
-
Take your other banana out of the fridge. Roll out your bright banana skin yellow fondant then drape it over the whole banana. Smooth and tuck it under the edges and trim away the excess. Use a fondant smoother to smooth it out and emphasize the angles. Fold the fondant at one end to create a nub.
-
For the stem of the banana, insert a hollow dowel under the fondant into the cake and wrap the fondant around the dowel. Use a fondant smoother to accentuate the lines.
-
Take your peeled banana cake out of the fridge. Cover the half of the banana that already has pale yellow fondant with another super thin layer of the pale fondant then wet the surface of the new layer. Roll out your darker yellow fondant and cover the whole banana with the sheet then use a sculpting tool to create lines accentuating the angles. Carefully cut through the lines (through both yellows) and peel back the fondant like a real banana.
NOTE: If you accidentally cut through the banana fondant, use some excess to patch and repair then re-texture it.
-
Use your veining tool again to create the same line detailing you did on the banana itself onto the inside of the banana peel then add shallow cuts to the inside of the peels. Clay extrude super thin strips of light yellow fondant and roll them out flat then add them to the peel.
-
Paint the inner banana with vanilla as well as inside the peeled back skin.
-
Use a dry brush to brush on some citrine lustre dust onto the end of the banana (around the nub) and the stem. Cut away any excess fondant around the stem dowel then paint it dark brown (where the banana attaches to the bunch) as well as the end nub.
-
Use brown gel color to add nicks and bruises with wet and dry brushes. Use a mix of pure and diluted gel coloring to create depth. Use a real banana as a model.
Congratulations you did it!
