How To: 4 Easy Buttercream Patterns with Basic Utensils!


Cake decorating can be fun, but it can also be SUPER overwhelming. From edible sparkles to luster dust to millions of piping tip options, it can be hard to know where to start. Especially if you’re a beginner, on a budget, or working in a small space without room for a million tools.
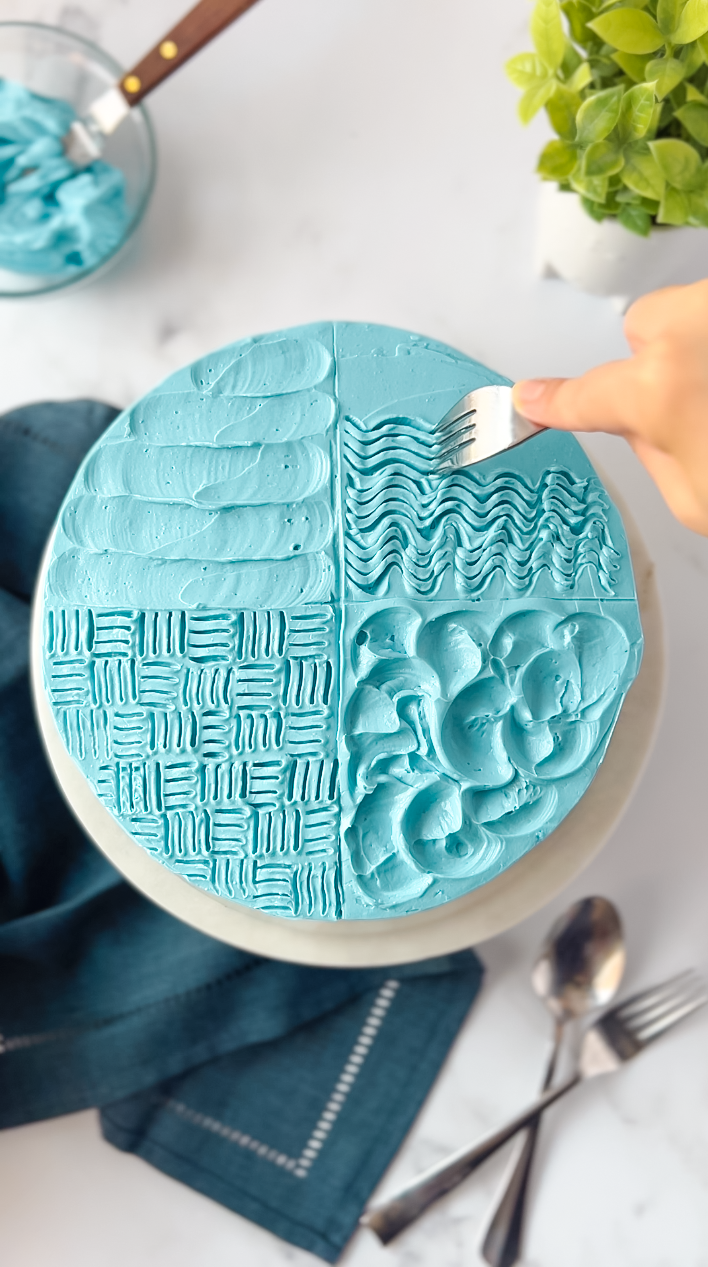
But we’re assuming you probably own, like, at least one spoon and one fork, right? Great! Because with just those two humble utensils there are at least four dynamic patterns you can create to level up any old plain frosted bake. Who knew the cutlery drawer was so versatile? Also reminder to go tidy that thing up, because if it’s anything like ours, it gets chaotic in there FAST. Where were we? Oh yeah, playing with buttercream and creating cute textures! All you'll need is a spoon and fork! Yes, seriously that’s it. Well, and whatever frosted cake type thing you’re decorating, obviously. This isn’t a trick, we swear! Let’s go.

Tools
- Fork
- Spoon


Read It!
-
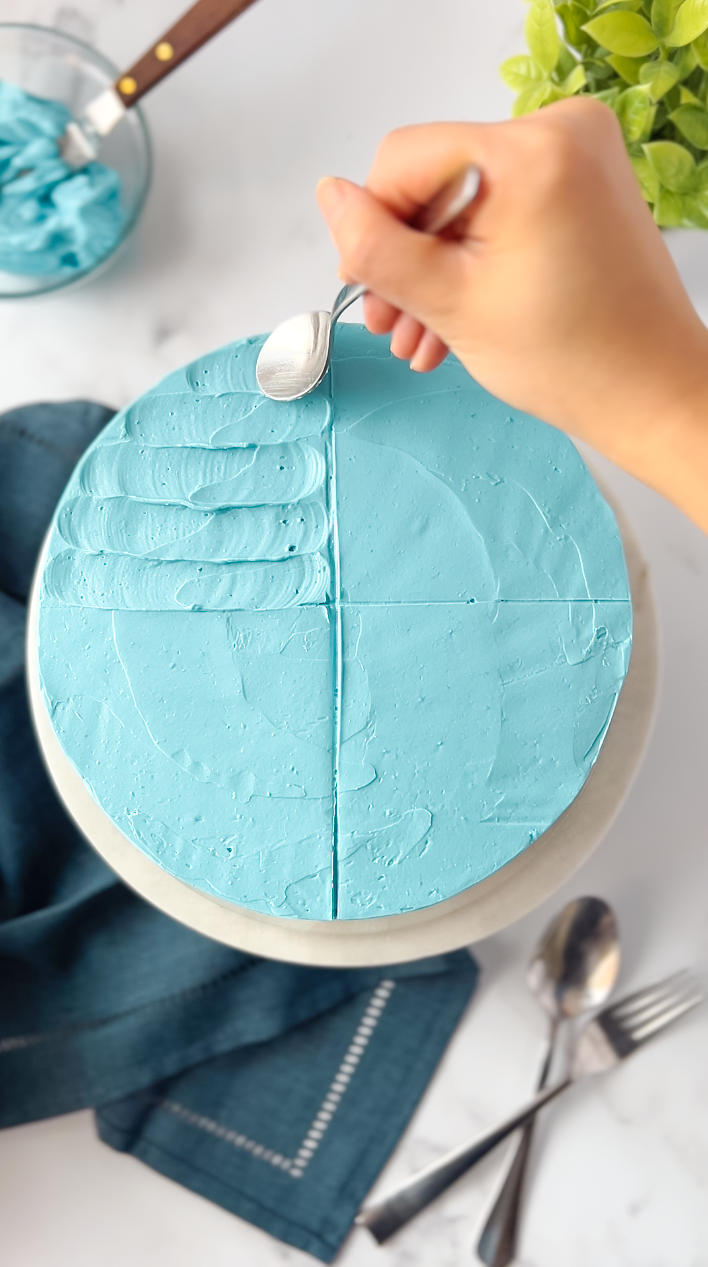
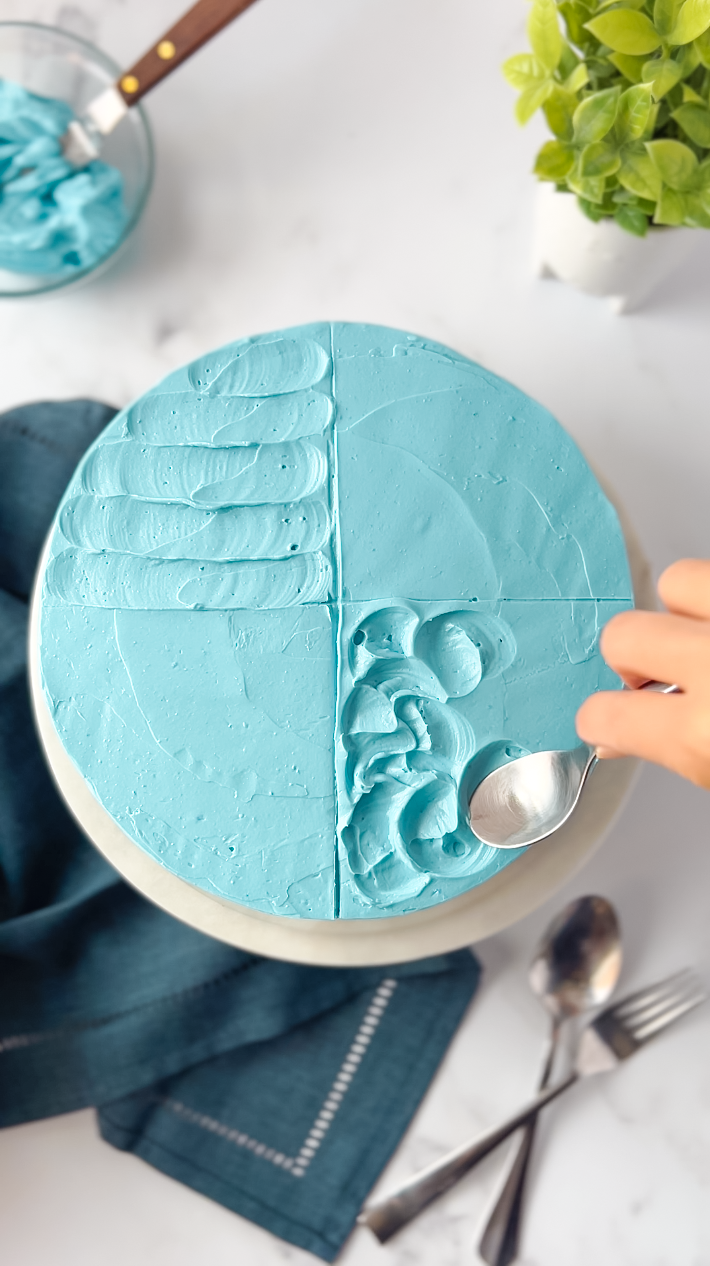
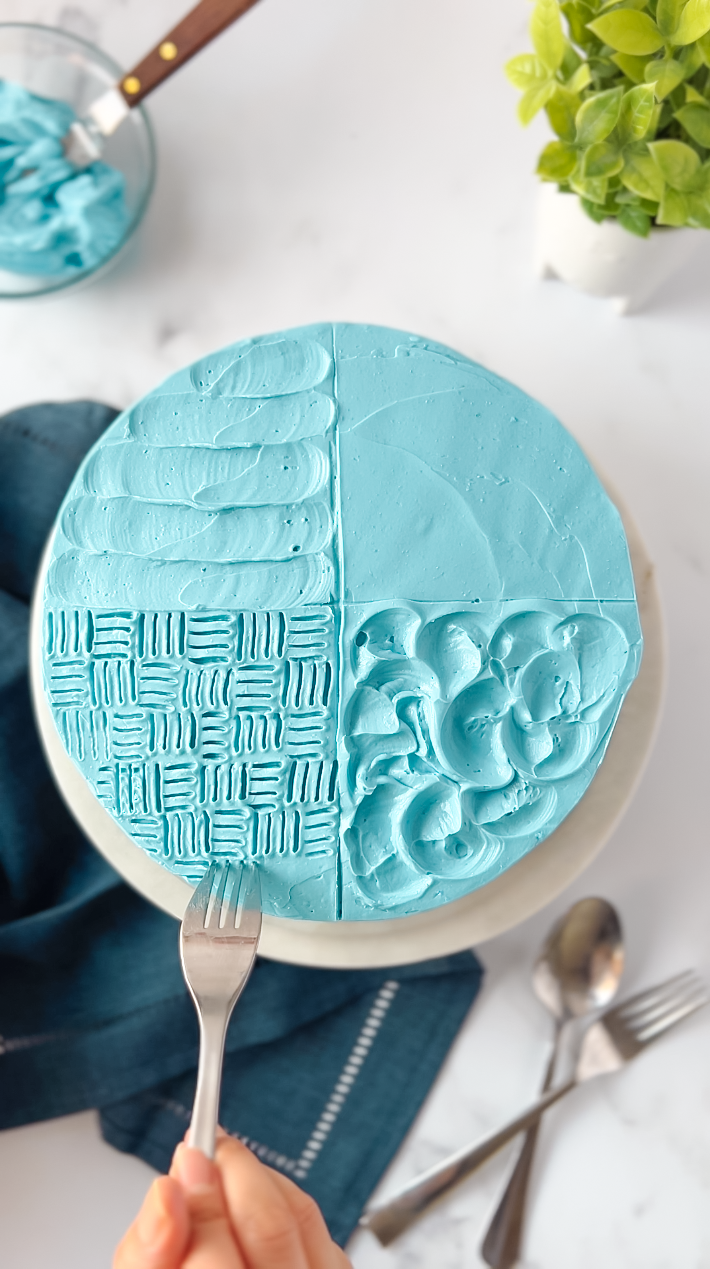
Using the back of a large spoon, slowly drag it from one side of the cake to the other in a straight line. Continue across the entire cake or leave half plain/covered in sprinkles.
-
Using the back of a small or medium spoon, push into the buttercream and swivel the spoon from side to side making an imprint. Repeat, overlapping your imperfect imprints across the entire top and sides of the cake. This is a fun technique for those of us who aren’t great with precision- a little messiness comes with the vibe!
-
Using a regular fork, drag it down into the frosting to make a little four-lines vertical square, then turn your fork sideways and make a little four lines horizontal square the same size next to it. Repeat, repeat again, keep repeating, until the entire surface looks like a patio floored with those outdoor ikea tiles. Don’t act like you don’t know what we’re talking about. We’ve all seen those tiles. This one is slightly more time consuming, but it’s still way easier than a pie dough lattice.
-
It seems almost ridiculous to type this out because it’s so simple- but you just drag your fork through the buttercream in a wavy squigle from the top to bottom. This is a fun look for an entire cake, but also makes an excellent easy ocean for a beach theme if you’re going the graham cracker crumb beach/gummy shark route.
So without buying anything, you now have four buttercream texture designs in your back pocket. You can use these on their own, or mix and match if you’re feeling funky. And we KNOW you’re feeling funky, right?
Congratulations you did it!
