Rarity Unicorn Cake


Baking charts for vanilla cake , Buttercream , Buttercream & toppings , Buttercream and toppings , Cake , Cake is , Cake is magic , Cake recipes , Collection--novelty-cake-recipes , Fondant , Fun , Funfetti , Icing , Magic , Mlp , Mlp rarity , My little pony , Novelty cakes , Rarity , Rarity pony , Recipes-export , Simple syrup , Unicorn , Unicorn cake , Vanilla

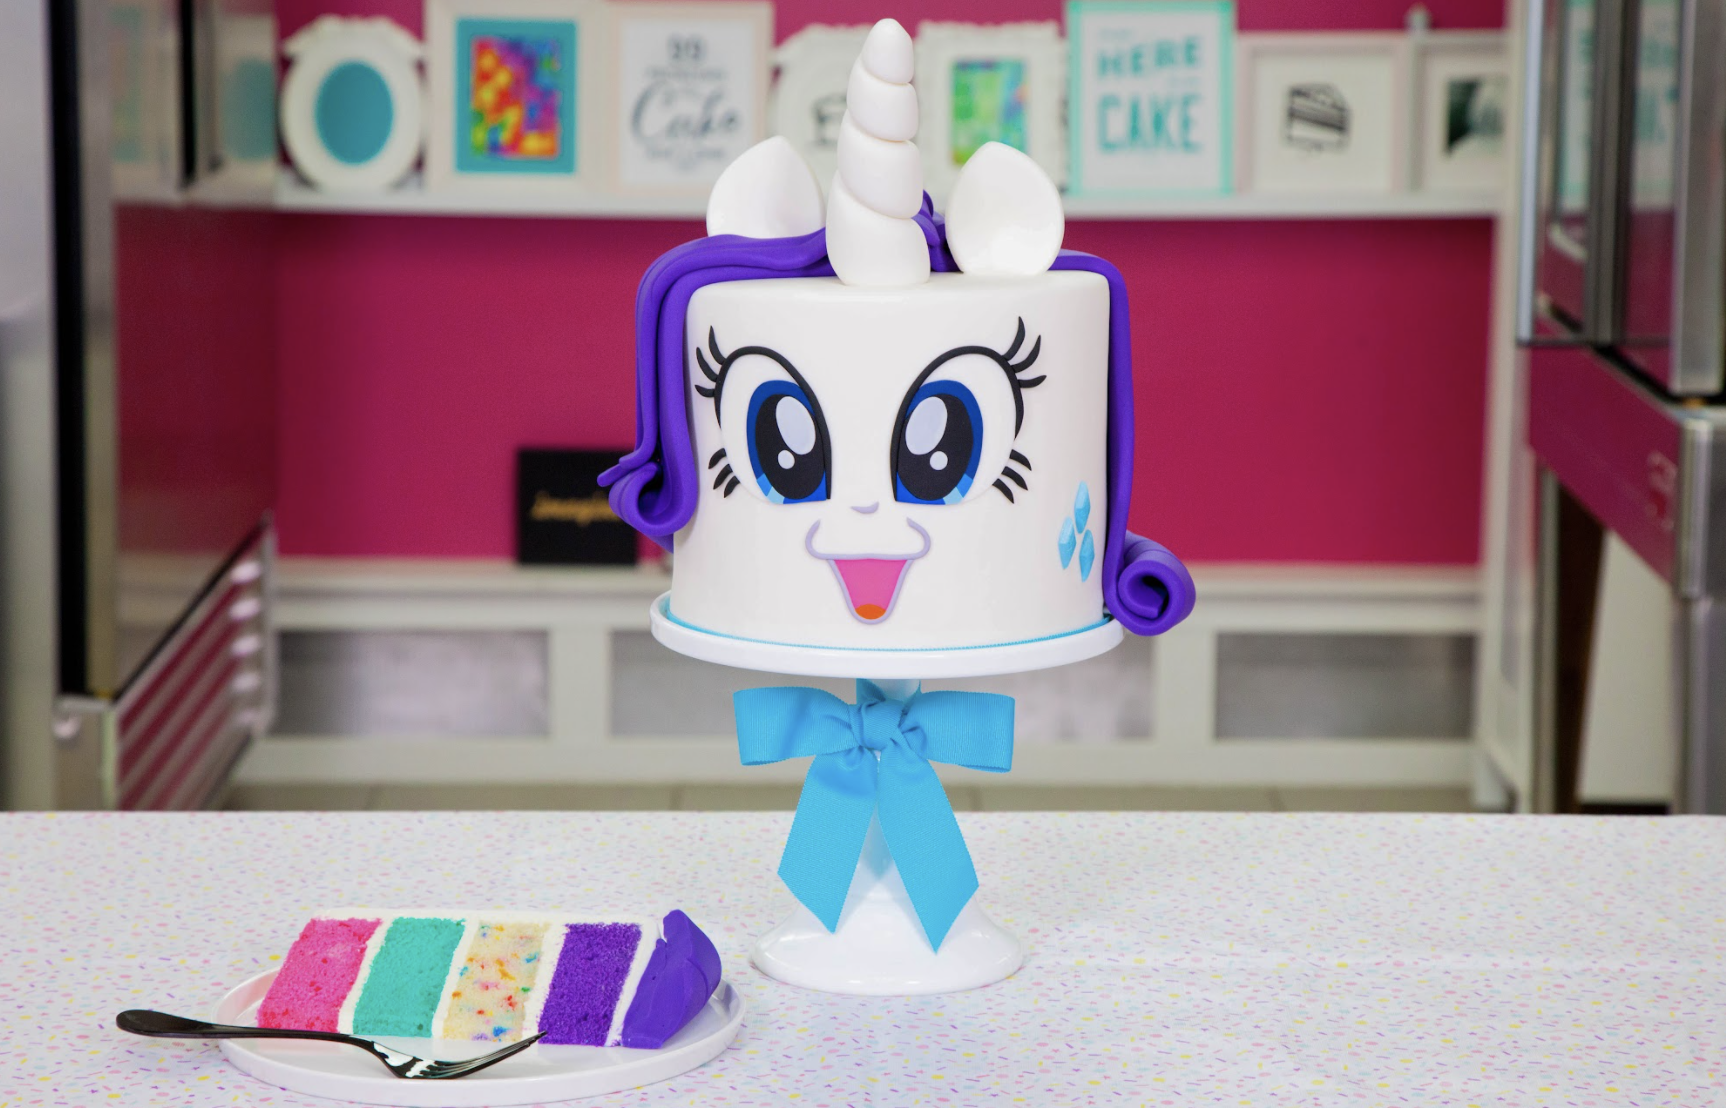
This cake is perfect for any My Little Pony fan, or, you know… Jocelyn! To make my Rarity Unicorn Cake, I baked a layer of Pink, Purple, Teal & Funfetti Vanilla cakes, stacked and filled them with smooth Italian Meringue buttercream, and covered it all in White fondant. Of course, I also had to decorate her with a fabulous Unicorn horn, ears, naturally “side-swept” purple hair and her three classic ‘cutie marks’!


Ingredients
Cake
- 10 lbs of Yo’s Ultimate Vanilla Cake
- Pink Food Coloring
- Purple Food Coloring
- Teal Food Coloring
- Rainbow Sprinkles
Icing
- Simple Syrup
- Italian Meringue Buttercream
Decorations
- White Fondant
- Black Fondant
- Blue Food Colouring
- Black Food Colouring
- Orange Food Colouring
- Pink Food Colouring
- Purple Fondant
- Pearl Luster Dust
- CMC
- Clear Piping Gel
- Royal Icing

Tools
- 4 x 8” Round Cake Pans, lined with parchment paper
- Simple Syrup Squeeze Bottle
- Cake Board
- Cake Stand
- Rubber Spatula
- Ruler
- Serrated Knife
- Small Icing Spatula
- Small Offset Spatula
- Fondant Roller
- Non-stick Mat
- Sharp Paring Knife
- Brushes
- Clay Extruder
- Lollipop Sticks
- Ribbon
- Fondant Smoother
- Bone Tool
- Jewel Mold


Read It!
-
Prepare 10 lbs of Yo’s Ultimate Vanilla Cake recipe and split the batter evenly into four bowls. Dye one bowl using some Pink Food Colouring, another using some Purple Food Colouring and the third bowl using some Teal Food Colouring. In the last bowl, gently fold in some rainbow sprinkles to create a Funfetti layer. Bake at 350 degrees for about 45 mins, or until a toothpick comes out clean. Cool cakes completely in their pans, sitting on a wire rack.
-
Prepare your Italian Meringue Buttercream. Set aside at room temperature.
-
Prepare your Simple Syrup and set aside at room temperature.
-
Once your cakes are completely cool, gently remove them from their pans and level with a serrated knife. Cut off all the caramelization from the bottoms and sides of each cake. Set aside.
NOTE: It’s helpful to lay your cake on an upside-down cake pan that’s about 1-inch smaller than your cake when cutting the caramelization from the sides.
-
Place all of your cake layers onto a flat surface and shower them with a layer of simple syrup. Allow the syrup to soak in completely before moving on to the next step.
-
Time to stack and fill your cakes! Because each layer is a different colour, you can definitely have fun with the placement of these layers. Place your first layer of cake onto a cake board. Using an offset spatula, spread a layer Italian Meringue Buttercream on top. Repeat this process with your next layer, and your next. Finally, gently lay your final cake layer overtop.
-
Crumb coat your cake with Italian Meringue Buttercream using a small offset spatula. Chill in the fridge for about 20 minutes. Before moving on to the next step, it’s important to make sure that your cake is still completely level at this point. Use a ruler to measure your cake and ensure that all sides are completely even. If it isn’t, just use a serrated knife to help level it off before you ice and chill again.
-
Remove your cake from the fridge and ice again with the same buttercream. This time, use the help of a Bench Scraper around the sides of your cake to help create a smooth finish. Chill for another 20 minutes.
-
While your cake is chilling, let’s make a Rarity’s Horn! Mix a bit of CMC into your White fondant to help strengthen it and roll out a long cord so that it’s tapered and thinner at one end, and thicker at the other. Take a 8” lollipop stick brushed with a bit of clear piping gel and begin to wrap your cord of fondant around the lollipop stick so that the thinnest part is at the top of Unicorn Horn. Continue to wind the fondant all the way down the lollipop stick so that it’s much thicker at the base. Once you reach about 3” from the bottom, trim the excess and gently roll the horn on a table to smooth it out and get it into a “cone” shape. Once you’re happy with the way it looks, insert the exposed bit of lollipop stick into a cake dummy so that it can sit upright and not flatten on one side. Let dry.
-
To make Rarity’s ears, use the same White fondant strengthened with a bit of CMC and cut out an “eye” shape, similar to an oval that’s tapered a bit at both ends. Pinch the ends of each ear together and use a lollipop stick for support. Once you’re happy with your ears, stick them into the same cake dummy to help them dry upright.
-
Once your cake is chilled, roll out some more White fondant into a circle that’s large enough to cover the entire cake and gently drape it over top. Working quickly (because the height of this cake will tend to cause fondant to tear along the top edge), smooth the fondant on the top of the cake with a Fondant Smoother in one direction. Start with 1 smoother and work to smooth the entire cake. Once you are satisfied, use another Fondant Smoother, or your hands, to smooth the sides from bottom to top, so that your hands meet at the top edges of your cake. Make sure the fondant is completely secure on top before moving down to the rest of your cake. Once you’re happy with the way it looks, trim any excess fondant away with a sharp paring knife.
NOTE: If you have any air pockets stuck underneath the fondant, just poke the air bubble with a straight pin and release the air through the hole you created before smoothing it over once again.
-
What’s great about using White fondant on a cake is how easy it is to FIX if you notice that you have any rips or cracks in your fondant! To do this, you can patch it up by simply using some Royal Icing. However, if you don’t have any Royal Icing on hand, take a look at my Apple Cake recipe, where I teach you another alternative for making your own Fondant Paste.
-
Cut out all of Rarity’s facial features using a template that you’ve blown up and printed from computer. First, cut all of the individual facial features out of your paper print-out, and then use them as a guide when cutting the same sized facial features for your cake using various coloured fondant. Secure all of the eye parts onto your eye base and all of the mouth details (like the tongue) onto your mouth base using a bit of water. Set aside.
-
Now, it’s time to bring Rarity to life! Attach her eyes, snout and mouth to your cake using a bit of brushed-on water. Next, use a Clay Extruder and a bit of Black and Grey fondant (mix white fondant with a bit of black fondant, its easier to achieve the light shade) to create the borders around her eyes and mouth. Attach with a bit of water or clear piping gel. Let dry.
NOTE: Once your cake is fully dry, carefully place it on a cake stand to complete the rest of these steps.
-
Rarity has some pretty fabulous purple hair! To create her look, roll out some Purple fondant and use a Bone Tool to create evenly-spaced ‘lines’ to help it look like strands of her hair. Once you’re happy with the way it looks, cut the fondant into sections for her front bangs, and layers for the back of her hair. Brush a bit of clear piping gel onto the top of your cake and place Rarity’s “bangs” on one side so that it falls into a “side-swept” or slightly gathered formation. We want her hair to look as naturally side-swept and fabulous as possible. Use some lollipop sticks to help her hair stay supported by pushing the lollipop sticks into the cake to support the“hair”from beneath the fondant. Once you’re happy with the way her bangs look, place in the fridge to chill.
NOTE: Make sure to remove the lollipop sticks just before you present this cake so that it still holds the hair’s structure.
-
Before we add her hair in the back, it’s time to attach Rarity’s horn and ears! Insert her horn into the very center of the cake by gently pushing the exposed lollipop stick into your cake. Next, insert both ears at either side. If necessary, patch up the ears using the same Royal Icing method mentioned in Step #12, or trim Rarity’s bangs with a sharp paring knife to help ensure there is room for the ears to fit snugly into the cake. Once you’re happy with the way her ears and horn look, attach the final hair strands at the back of the cake.
-
Of course, I obviously had to add Rarity’s classic three ‘cutie marks’ onto this cake! To create these jewel-looking ‘cutie marks’, I used a Silicone Jewel Mold. Press a bit of coloured fondant strengthened with CMC into the mold and let it dry. Once formed, pop them out of the silicone mold and brush with a bit of luster dust. Use a sharp paring knife to create the little ‘indents’ along the edges of each jewel. Then, glue all three to her cheek with a bit of clear piping gel. Let dry.
NOTE: The jewels get popped out of the mold right away. If they dry in the mold, you will not be able to make the indents with the knife.
-
Take any brightly-coloured ribbon you have on hand and wrap it around the stem of your cake stand for an extra SWEET finishing touch!
Congratulations you did it!
