Avocado Cake


Avocado , Avocado toast , Breakfast , Breakfast cake , Breakfast recipe , Buttercream , Chocolate , Cinco de mayo , Collection--novelty-cake-recipes , Fondant , Food , Foundant , Fresh fruit , Fresh fruit cake , Fruit , Fruit cake , Holidays , Kinder eggs , Novelty cakes , Recipes-export , Simple syrup , Vegetable

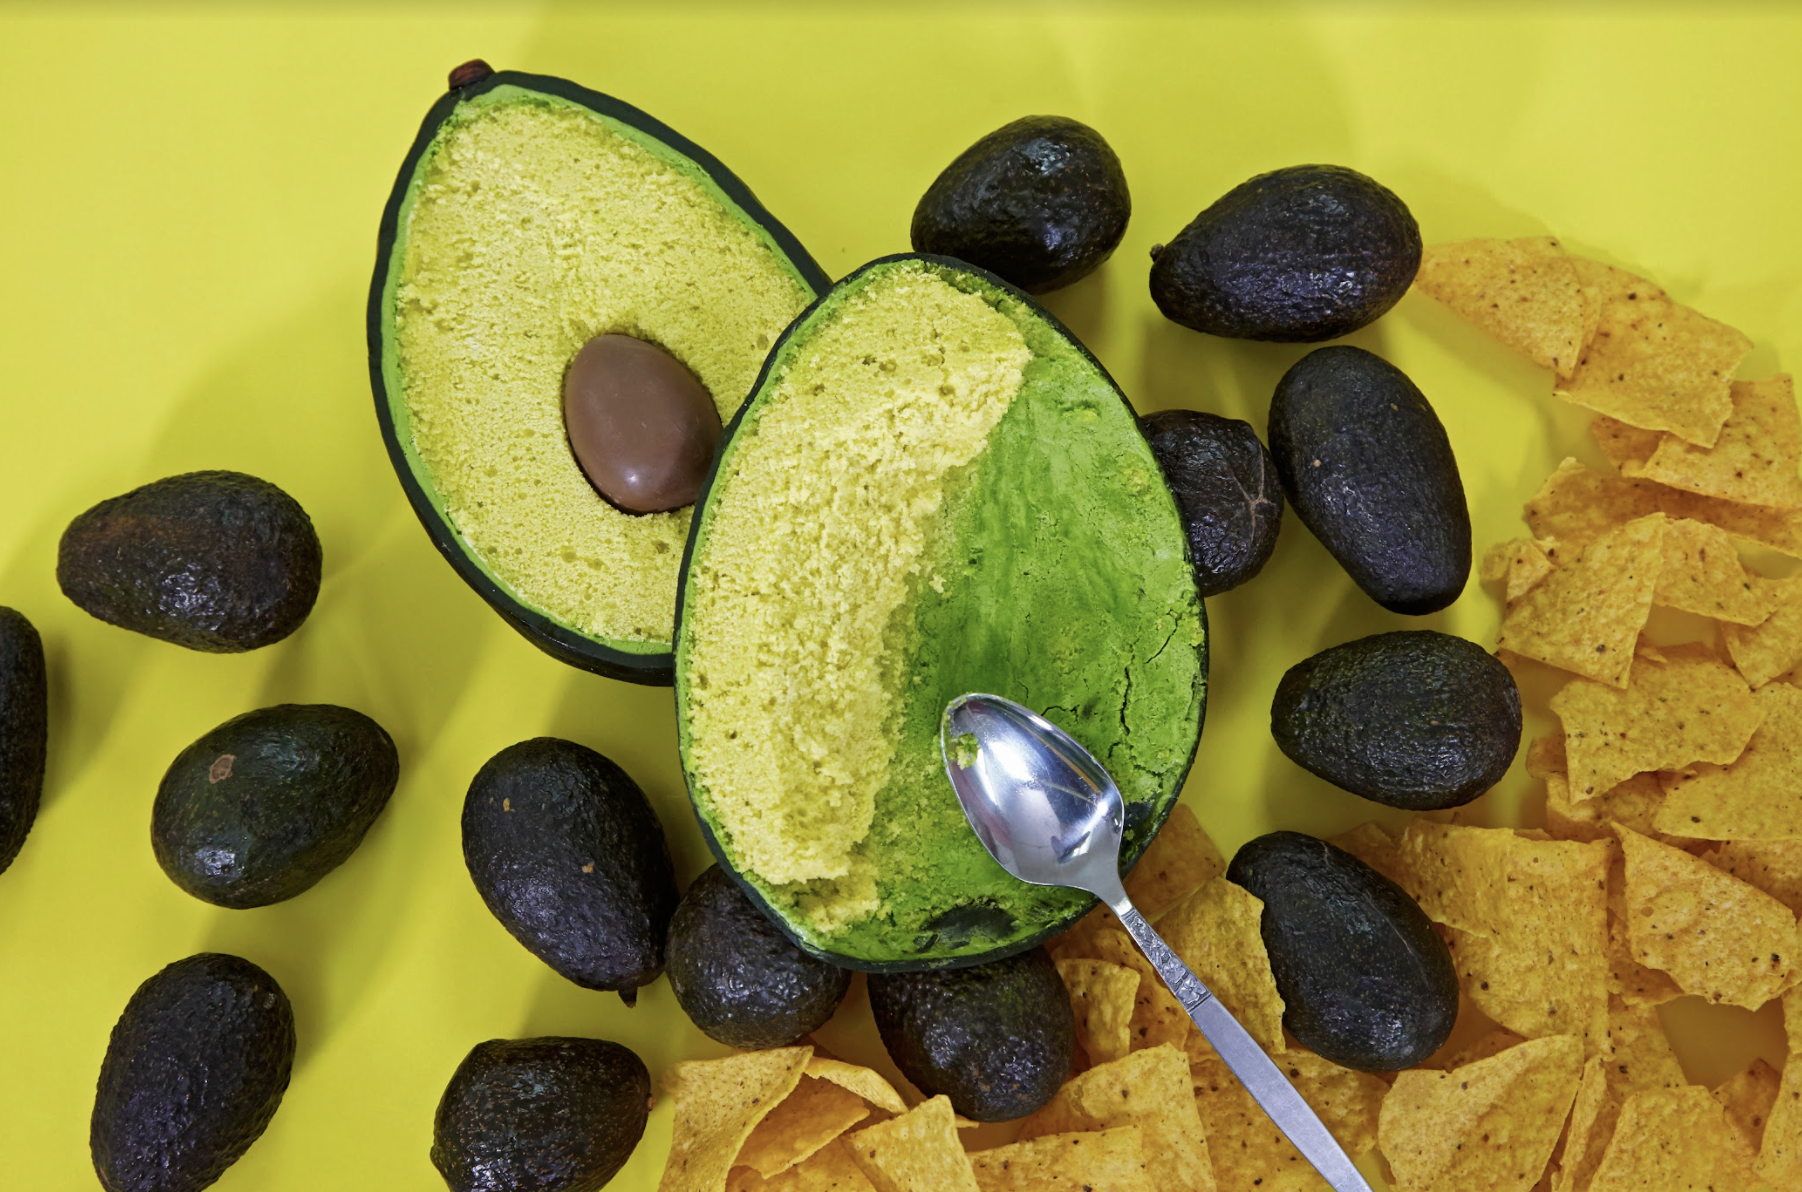
It’s Everyone’s Favourite $2 Add-On At Chipotle… but in CAKE! In my opinion, you can't have a true FIESTA without two things: a heaping bowl of guac & chips and some yummy CAKE! (Well, okay… you also need music, and you know… people. But, you get my point: I’m a BIG fan of avocado.) So, I thought - why not combine the two?
To celebrate the fiesta of all fiestas, Cinco De Mayo, I’ve caked up a GIANT avocado with green-dyed Vanilla cake, melted chocolate, Italian meringue buttercream and realistic fondant details. I even hid a chocolate pit inside, so that no matter how you slice it, it looks just like a real avocado!


Ingredients
Cake
- 4 lbs Yo’s Ultimate Vanilla Cake
- Wilton Color Right Base Yellow
- Americolor Avocado
Icing
- Simple Syrup
- Italian Meringue Buttercream
- Wilton Color Right Base Yellow
- Americolor Avocado
- Wilton Leaf Green
- Kinder Eggs
- 6oz Light Cocoa candy melts
- 4oz Vibrant green candy melts
- 4oz Yellow candy melts
Decorations
- 1 1/2 lbs White Fondant
- Wilton Moss Green
- Americolor Chocolate Brown
- Icing Sugar
- Clear Food Grade Alcohol
- Cocoa Powder

Tools
- Egg Pan, lined with parchment paper
- Simple Syrup Squeeze Bottle
- Rubber Spatula
- Small Offset Spatula
- Small Icing Spatula
- Ruler
- Serrated Knife
- Small Serrated Knife
- Rolling Pin
- Icing Sugar
- Fondant Smoother
- Paring Knife
- Flower sponge
- Tin Foil
- Brushes
- Rubber Spatula
- Parchment paper


Read It!
-
It’s very important to grease your pan properly or you may run the risk of not being able to remove your cakes from their pans later on. Lay one of your egg pans face-down onto a sheet of parchment paper. Trace around the shape of the pan with a pencil and cut it out of your parchment sheet. Next, cut slits into the egg-shaped parchment sheet starting from the edge and cutting toward the center, making sure not to cut all the way through to the other side. Lay your parchment into the egg pan so that the slits overlap each other. Grease your pan very well, especially the parts not covered by your parchment sheet. Set aside.
-
Prepare 4 lbs of Yo’s Ultimate Vanilla Cake recipe. Using your Wilton Color Right Base Yellow & Americolor Avocado icing colours, dye your batter so that it looks like the inside colour of an avocado. (It’s helpful to have an open avocado around you, or at least a picture of one to get the colour just right.) When you’re happy with the colour, divide your batter into each of your egg pans. Bake at 350 degrees for 1 hour and 15 mins, or until a toothpick comes out clean. Cool cakes completely in their pans sitting on a wire rack.
NOTE: If you don’t have an egg pan, feel free to bake this in a sphere pan instead. You’ll obviously just have more carving to do later on! -
To make my ‘pit’ I chose to use a Kinder egg - it’s the appropriate size and easy to cut open because there’s a clear seam. Take the tip of your sharp paring knife and carefully open the Kinder egg into two halves, working slowly. Remove the toy inside. Melt down your light cocoa candy melts and pipe them into both halves of the eggs so that they are completely full and levelled to the top. Use a small spatula to scrape away the excess chocolate and place them into fridge to chill until the chocolate is set.
NOTE: Make sure your melted chocolate isn’t too hot before piping it into chocolate egg, because it will just melt the egg. -
Prepare your Italian Meringue Buttercream. Colour 2 cups of buttercream with ⅛ tsp Leaf Green, 8 drops of Yellow and 18 drops of Avocado, so that it also looks a little darker green than your cakes. Set aside.
-
Prepare your simple syrup and set aside at room temperature.
-
Once your cakes are completely cool, level each cake while they are still inside their pans by running a serrated knife along the top of the pan and cutting it flush to the height of your cake pan. Flip your cakes over and carefully remove each cake from their pans. If it’s not coming out, try gently running a small straight spatula along the inner edges of the pan to help remove it. Turn each cake flat-side down, remove the parchment paper and trim away the entire layer of caramelization with a small serrated knife.
NOTE: If the batter spills over a bit while baking, make sure to cut away the cake around the pan first with a small knife so that you can see where the pan begins at the top before cutting the cakes level to the top of the pan. -
Hold both egg halves together lightly in your hand and use your serrated knife to begin carving both halves of your avocado. If you used an egg pan, you won’t have to do much carving because it’s already tapered at the top. Place your halves together to make sure they line up exactly and carve away any excess. When you’re happy with the way they look, place both halves on your workspace so that the flat sides are facing up.
NOTE: It’s a good idea to have a picture of an avocado, or the real thing, beside you to help you carve. But remember - nature grows avocados in all shapes and sizes, so there’s no wrong way to shape it. -
Remove your chilled Kinder egg halves from the fridge. Lay one chocolate egg half in the lower two-thirds of the avocado, placing the flat side of the egg on top of the flat side of the cake. Score around your chocolate egg with the tip of your sharp paring knife. Set your chocolate egg aside. Making sure the measurements are the exact same with both halves of the cake, use your ruler to measure the distance from the edge of your first cake to the mark you made where your pit will be placed. Then, place your chocolate egg at the same distance on your second cake half and repeat the process above.
-
After both cakes are scored, use a spoon to scoop out the cake in that area, keeping in mind how deep each Kinder egg half is. (We don’t want to scoop out too much!) Make sure the half of your chocolate egg fits exactly in the space you made in your cake so that the flat side of your egg sits flush with the flat-side surface of your cake.
-
Once you’re happy with the way your chocolate eggs fit into your cake, remove them from the inside of your cakes and glue both halves of your Kinder eggs together with some melted candy melts. Fill in any gaps in the seams with melted candy melts, using a small straight spatula to scrape away any excess so that it’s smooth on all sides. Set aside.
-
Flip both halves of the cake so that the flat sides are facing down. Shower your cake layers with simple syrup, making sure to move your cakes out of the syrup puddle you’ve created or they will get soggy. Allow the simple syrup to soak in completely before moving on to the next step.
NOTE: Simple syrup tends to run off the sides of dome-shaped cakes, and they end up sitting in a pool of syrup which will make them soggy if they are left sitting in the puddle. -
Melt down your yellow and green candy melts into separate bowls, then slowly add a bit of the green into the yellow until it’s as close to the colour of your cakes as possible. Flip your cakes flat-side up and spread a bit of melting chocolate onto one of the flat sides of your cake halves using an offset spatula, making sure to avoid the cavity where your chocolate pit will go. Work quickly - you don’t want the candy melts to harden up before it’s secure! Once your cake is covered with the chocolate, place your whole chocolate pit inside. Carefully flip the other half of your cake over onto the chocolate-coated layer and press together carefully. Secure it all together by piping some extra melting chocolate into the seams. Let dry.
-
Crumb coat your cake with your green Italian Meringue buttercream using your small offset spatula & chill in the fridge for about 20 minutes. Let the cake settle naturally on its side with the seams around the middle.
-
Remove cake from the fridge and ice again, making sure that the buttercream is completely smooth and even on all sides. Chill for another 20 minutes. Once the buttercream is chilled and firm, smooth out any ridges with wet fingertips or a small straight spatula and set aside.
NOTE: It’s okay if your icing is spread on a little bit thicker! We want to be able to see a nice layer of icing around the cake once we cut it in half. -
Dye most of your white fondant,save just a ½ oz) with a mix of Wilton Moss Green and Americolor Chocolate Brown to create a darker green colour that looks closer to the outer ‘skin’ of an avocado. Knead your fondant until the colours blend completely. Set aside.
NOTE: Avocados change colour as the ripen, so play around with the colour of your fondant to match your avocado colour! -
Roll out your coloured fondant to be about ⅛ of an inch thin and drape over the entire cake, tucking the fondant underneath as best as you can and cutting away a bit of the excess with a sharp paring knife. Flip the cake over onto a floral sponge and begin tucking and smoothing the remaining fondant as best as you can, trimming away any excess.
NOTE: This is a great ‘starter’ fondant cake, because your fondant doesn’t have to be perfectly smooth and crease-free. -
To create your avocado’s skin texture, take some crumpled-up tin foil and press it all over the fondant until you get that wrinkly skin look. Once you are happy with the overall texture, chill your cake in the fridge for about 20 minutes until firm.
NOTE: If your cake is starting to get too warm, you may want to chill it for a bit before continuing; otherwise the tin foil may break through the fondant. You can take a look at how I use a similar process in my Apple Pie cake here. -
While your cake is chilling, let’s create the ‘nub’ that sits at the top of your avocado. With your remaining white fondant, mix in a bit of Americolor Chocolate Brown to create a ‘tan’ colour. Shape the ball of fondant in your hand and use a veining sculpting tool to add a bit of texture to it. Be sure to look at an avocado to make yours resemble the one you’re using as a model. Set aside.
-
Remove your cake from the fridge. Mix a bit of Americolor Avocado, a speck of Americolor Chocolate Brown and some clear food grade alcohol together in a small bowl. Paint this mixture all over your entire avocado cake with a clean brush. While the paint is still wet, secure your ‘nub’ to the top of your avocado. Next, paint over the whole nub with with a bit of Americolor Chocolate Brown and clear food grade alcohol mixed together. Let dry.
-
Once the paint is completely dry, dust some cocoa powder all over your cake with a dry brush to give it a more dull, natural effect. Let dry.
NOTE: I love when I can use an actual ingredient in the decorating process, because a little cocoa never hurt anybody! It’s a very natural brown - perfect for this natural & delicious food! -
To be honest, the best part of this cake was CUTTING IT! Slice your cake in half the same way you’d cut an avocado, revealing your Kinder egg chocolate pit. Go ahead and dig in with a spoon - because, why not!? It’s perfectly ripe in my opinion. YUM!!
Congratulations you did it!
