Giant Apple Cake


I’m Caking A Big Apple! No, Not “THE” Big Apple… Literally A GIANT Apple!
Ah, back-to-school season… there’s nothing like showing up on the first day of school and handing your new teacher a big, beautiful apple. But, let’s be honest, if I were still in school, I wouldn’t just give my teacher an apple - I’d give her this GIANT Apple Cake! Trust me, you give your teacher this on the first day of school, and you’re definitely gonna have a SWEET year ahead.
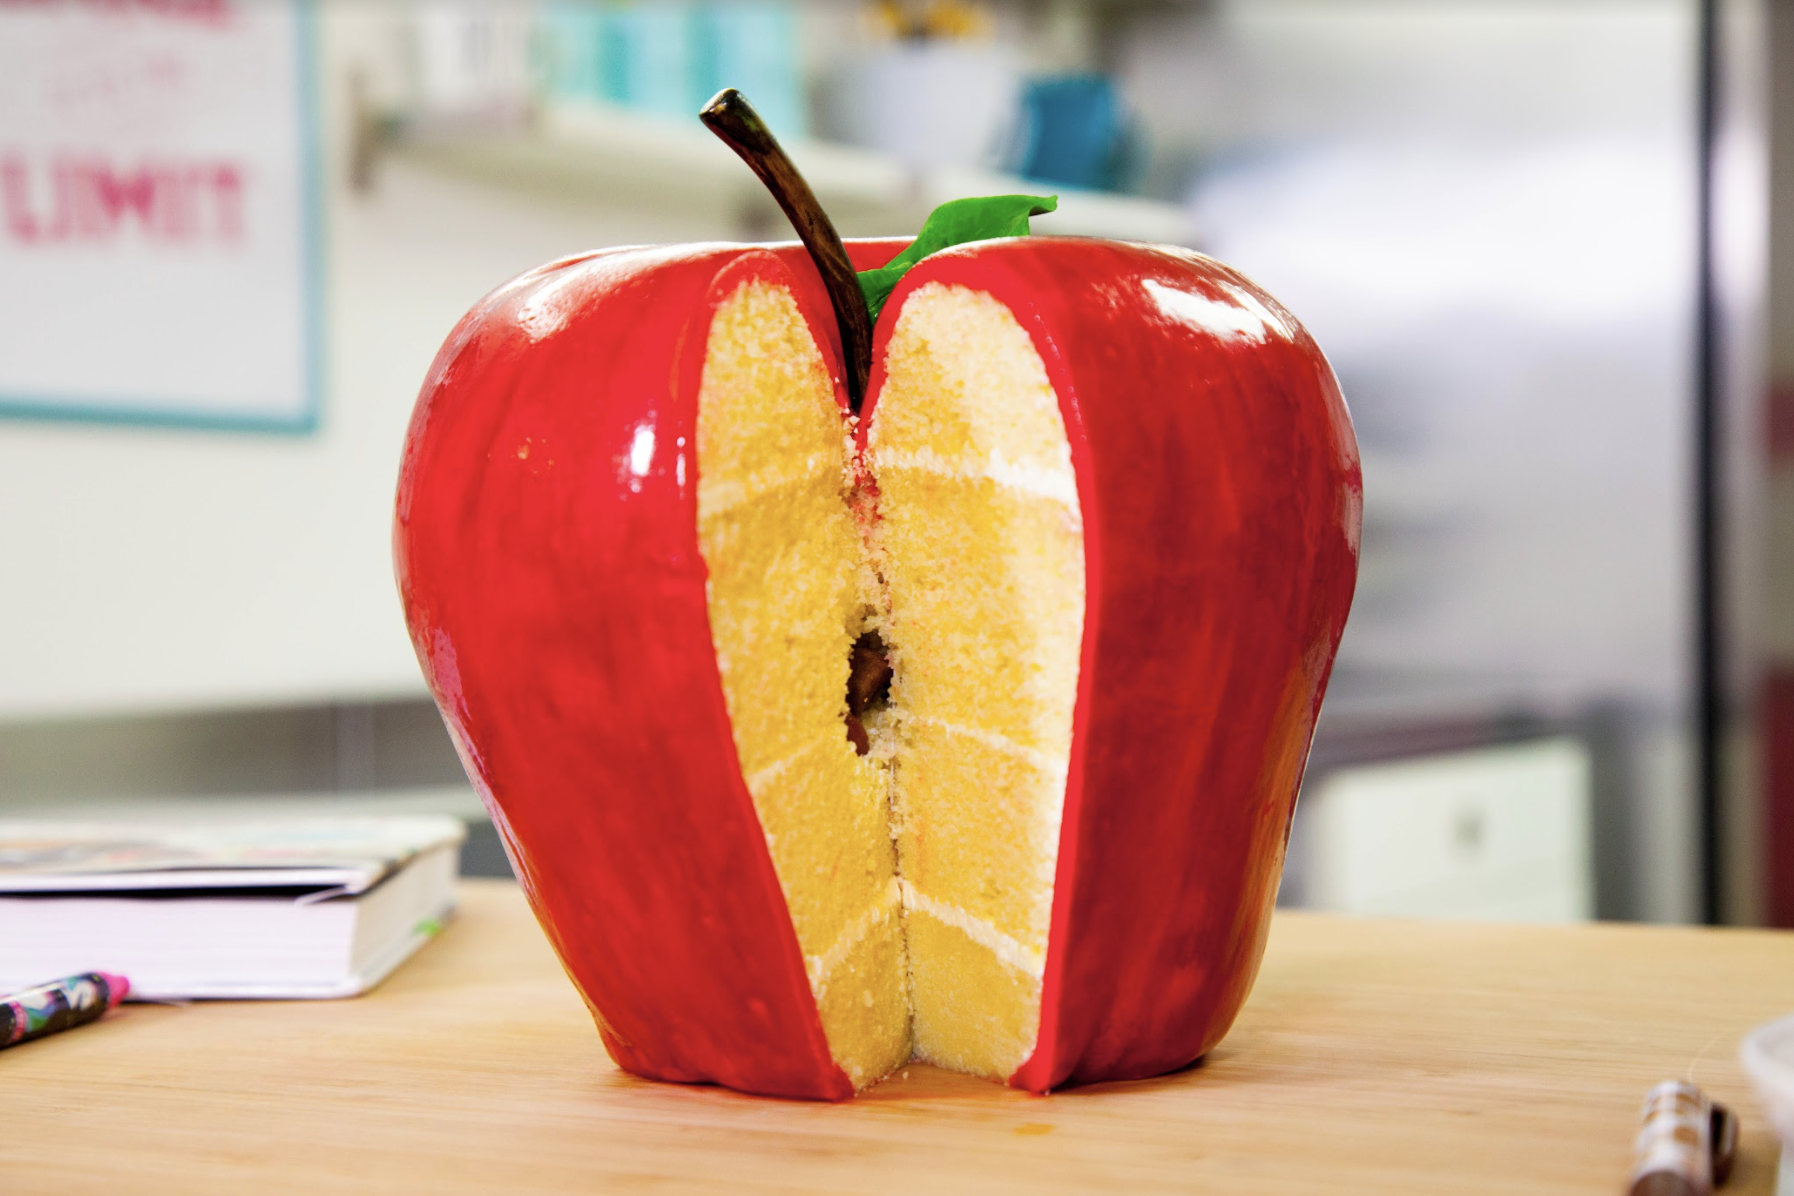
To make my Giant Apple Cake, I created a *secret chamber* apple core in the middle of layers of delicious Ultimate Vanilla cake and Italian Meringue Buttercream. Then, I covered the entire cake in deep red fondant and painted it to look like a ripe bright, speckled apple. I even attached a gumpaste stem and leaf on top!


Ingredients
Cake
- 12 lbs of Yo’s Ultimate Vanilla Cake
Icing
- Simple Syrup
- Italian Meringue Buttercream
- White Chocolate Candy Melts
- Green Food Colouring
- Brazil Nuts
Decorations
- 3 lbs Red Fondant
- Gum Paste
- Green Gum Paste
- Red Food Coloring
- Golden Yellow Food Coloring
- White Food Coloring
- Brown Food Coloring
- Clear Food Grade Alcohol
- Piping Gel
- Green Color Dust
- Yellow Color Dust


Read It!
-
Prepare 10 lbs of Yo’s Ultimate Vanilla Cake. Split batter between two 8” round cake pans and two 9” round cake pans. Bake at 350 degrees for 1 hour and 20 minutes, or until a toothpick comes out clean. Cool cakes completely in their pans, sitting on a wire rack.
-
Prepare your Italian Meringue Buttercream. Set aside at room temperature.
-
Prepare your Simple Syrup and set aside at room temperature.
-
Once your cakes are completely cool, gently remove them from their pans and level with a serrated knife, and cut off all the caramelization from the bottom of each cake. Set aside.
-
Place all of your cake layers onto a flat surface and shower them with a layer of simple syrup. Allow the simple syrup to soak in completely before moving on to the next step.
-
We’ll be stacking and filling this cake in two parts because it’s going to help when we eventually put apple seeds inside the actual cake. To do this, take your two 8” round cakes, stack them together and fill the center with Italian Meringue Buttercream. Set aside. Then, take your two 9” round cakes and stack and fill them with Italian Meringue Buttercream, as well. Place both cakes in the fridge to chill separately.
-
Once your cake is chilled, stack the larger cake on top of your smaller cake (without putting any buttercream in between them) and start carving! Using a serrated knife, begin rounding out the top and creating a little “valley” in the center of the top of your cake. This is where your stem and leaf will go. Then, start moving down your cake, carving inward as you go down so that it’s tapered. When you reach the bottom, begin carving the apple’s “feet” so that it doesn’t sit perfectly flat. Once you’re happy with shape, remove the top half of your cake from the bottom half and flip it over so that the flat side is up.
NOTE: To learn more about how I carved my Giant Apple Cake, check out my YouTube video! -
Time to create our apple core - or *secret chamber*! Use a calyx cutter to mark the center of both cakes. Next, use leaf cutter (or similar) to cut five “teardrop”-shaped indents into the centre of each cake, scooping all the excess cake with a spoon. When you’re happy with the shape of your apple’s interior, coat the secret chambers with a bit of melted white chocolate (mixed with a touch of green). Brush your melted chocolate mixture onto each one of the secret chambers with a paint brush to help hold all in the crumbs so you can later place your apple seeds in neatly. Let dry.
-
Once your chocolate is dry, spread a bit of Italian Meringue Buttercream onto the top layer of the bottom half of your cake. Next, place one Brazil nut (or similar) into each of the 5 secret chambers, which will act as your apple seeds. Finally, carefully flip the top section of your cake overtop of your bottom half and align it with the bottom chambers.
-
Once your cake is fully aligned and stacked, crumb coat your cake with Italian Meringue Buttercream using a small offset spatula. Chill cake in the fridge for about 20 minutes.
-
Remove cake from the fridge and ice again, creating a smooth finish. Chill for another 20 minutes.
-
While your cake is chilling, let’s work on the stem and leaf! Roll out some green gumpaste nice and thin, and use an impression mat (I used a Rose Leaf impression mat) to press your gumpaste between the two mats, creating a leaf-like texture. Trim your leaf with a sharp paring knife and let it dry it on a crumpled piece of paper towel.
NOTE: It’s a good idea to make more than one of these - just in case one of them breaks before your assembly!
-
Mix a bit of the same green gumpaste that you used to make your leaf with a bit of regular gumpaste to lighten it up. Roll your lightened gumpaste into a cord and trim it to the right length for your cake’s stem. Once you’re happy with the way it looks, insert a piece of floral wire inside your gumpaste cord. Dry your stem upright by inserting the wire into a cake dummy, and bend it ever-so-slightly so that your stem becomes a bit curved. Let dry.
-
Now, it’s time to cover your cake! To create your apple’s deep red colour, mix your red fondant with a bit of white fondant that’s already been pre-mixed with a bit of Ivory and Yellow food colouring. This will just ensure that the apple doesn’t look too vibrant and unrealistic. Once you’re happy with the colour, remove your cake from the fridge and roll out your red fondant large enough to cover the entire cake. Pick up your fondant with a French Rolling Pin and drape over the entire cake. Starting from the top, smooth the fondant down with your hands, being careful of the folds. Tuck the fondant underneath your cake as best as possible and cut away any excess with a sharp paring knife. Continue this process of smoothing and trimming until you achieve an even finish and your fondant is flush to the cake. (Don’t worry about any cracks in your fondant - we will address this later!) Place your cake in the fridge to chill.
NOTE: There’s going to be some air trapped in the “valley” at the top of your cake, so just use a straight pin to poke the top of your air bubble and press the air out.
-
While your cake is chilling, let’s create a fondant paste that we can use to repair any cracks in your fondant. Work a bit of clear food grade alcohol (you can also use water!) into your remaining red fondant until it’s the consistency of Royal Icing. Remove your cake from the fridge and spread an even layer overtop of the cracks, making sure that the paste goes directly into those crevices. Scrape away any remaining paste so that it only remains in the cracks. Wet a paintbrush and brush in a consistent downward motion all over the cake to further smooth the paste. (This will also add to the texture of your apple, which will be enhanced once we start painting!)
-
First, paint your entire Apple Cake using a mixture of Red food colouring and a bit of clear food grade alcohol. Paint your entire apple in one direction, from the inside of the “valley” to the bottom of the feet, all around the apple. Let dry.
-
Once your first coat is dry, create a second paint mixture using some Golden Yellow food colouring mixed with a touch of White and some clear food grade alcohol. This time, paint your Apple Cake from the top to bottom in patches, so that the colouring isn’t consistent throughout - just like a real apple! While it’s still wet, speckle your apple with some remaining yellow food colouring so that the dots disperse and aren’t so heavy. Let dry.
NOTE: Continue to paint your apple until you are happy with it. If you have added too much yellow - don't worry! You can keep painting in layers until you achieve the perfect skin!
-
Before we assemble, let’s enhance the colour of our leaf and stem to help make it look more realistic! To do this, use some dry Green and Yellow colour dust and brush it onto your gumpaste leaf. Try to really get the dust into the veining to really enhance the impression and texture of the leaf altogether. Once you’re happy with the way it looks, set it aside.
-
To make your stem look more realistic, brush some brown gel food colouring in an upward motion onto your gumpaste stem - concentrating more of the brown colour at the top of the stem, where it’s typically more dried up. Allow to dry.
-
Time to add your stem and leaf! Carefully insert the stem down into the centre of your apple with the exposed floral wire. Attach your leaf by either using a bit of royal icing to hold it in place, or just propping it up against the stem like I did.
Congratulations you did it!
